How To Break In FootJoy Golf Shoes: Easy Guide
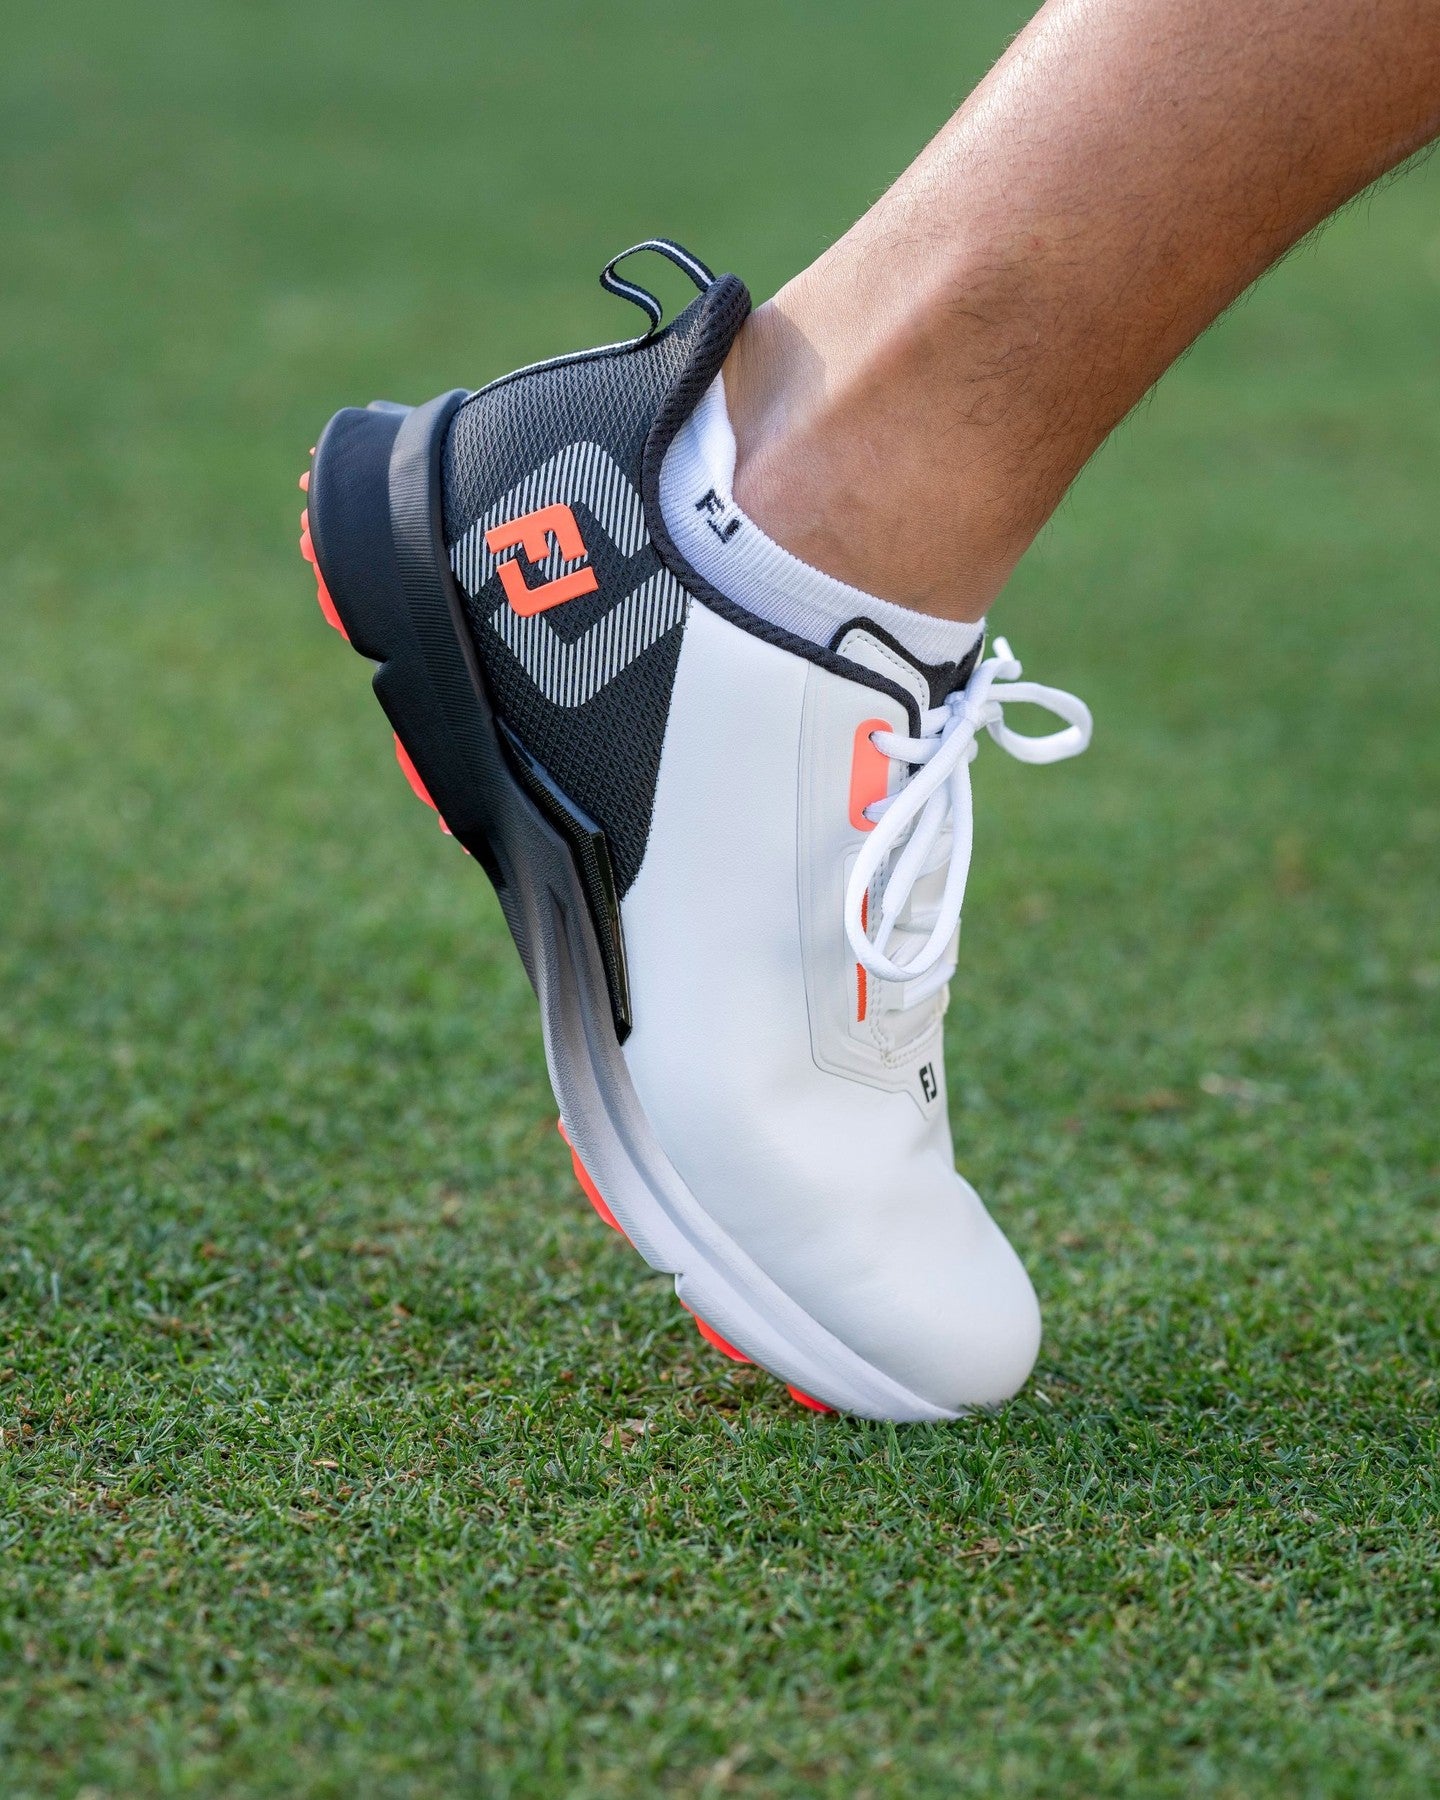
Breaking in FootJoy golf shoes is a gradual process. The goal is not to make the shoe feel loose. The goal is to help the upper, tongue, insole, and sole move with your foot while keeping the support that you need during the golf swing.
A new pair may feel firm at first, especially around the heel counter, toe box, arch, or ankle collar. This is common with leather and structured synthetic shoes. A careful break-in routine can reduce hot spots and help you walk, practice, chip, pitch, and play with more comfort.
The best approach is simple: check the fit, wear the shoes for short periods, use them during easy practice, and increase time slowly. Do not try to soften them with heat, water, or force. Those shortcuts can harm the materials and change the way the shoe supports your stance.

Quick Answer: How Do You Break In FootJoy Golf Shoes?
The best way to break in FootJoy golf shoes is to wear them indoors with golf socks for 20 to 30 minutes, then use them for short practice sessions before playing a full round. Walk on level ground first, check for rubbing, and increase wear time over several days. Keep the shoes clean and dry, and follow the care directions for the specific model.

Most golfers need several short wearing sessions rather than one long round. A beginner may need more time to notice pressure points. A senior golfer, junior golfer, or player with sensitive feet should use shorter sessions and stop if pain begins.
Do not confuse a firm feel with a poor fit. A golf shoe should feel secure in the heel and midfoot, with enough room for the toes to spread. It should not pinch, slide, or force your toes against the front when you walk downhill.
Why a Careful Break-In Matters
A golf shoe affects more than comfort. It also affects your stance, foot pressure, balance, and ability to push into the ground during the downswing.

During a golf swing, the feet help create a stable base. Your stance width, posture, and weight shift depend on that base. If a shoe rubs your heel or squeezes your toes, you may change your stance without noticing. That change can affect your backswing, downswing, impact, and follow-through.
A well-broken-in shoe can help you focus on the shot instead of your feet. This matters most when walking a long course, playing in heat, or facing uneven lies in the rough or on a links course.
Comfort Can Support Better Practice
New golfers often spend time learning grip, posture, ball position, and tempo. Foot pain adds a needless distraction. If you are thinking about a blister while trying to learn a basic backswing, your practice quality may drop.
Improving amateurs may notice the issue in a different way. A stiff shoe can make a golfer feel restricted during rotation. That feeling may lead to a narrower stance, a shorter follow-through, or an attempt to stay too still over the ball.
The shoe is not a swing fix. It cannot correct a slice, hook, poor contact, or weak putting stroke. It can, however, remove one source of discomfort that makes practice harder.
Walking and Riding Create Different Demands
A walking golfer places more repeated stress on the heel, forefoot, and arch. A rider may spend less time walking, but still needs a secure shoe for the swing and for uneven ground near the tee box or green.

Players on an executive course may walk many short holes. Players on a long championship course may face several miles of walking. Juniors and seniors may also need more frequent breaks while their feet adjust to a new shoe.
| Golfer or use | Main break-in concern | Best starting approach |
|---|---|---|
| Walking golfer | Heel, arch, and forefoot fatigue | Short walks on level ground |
| Riding golfer | Swing stability and heel slip | Indoor wear, then range practice |
| Junior golfer | Fit, growth, and pressure points | Brief sessions with proper socks |
| Senior golfer | Stiff joints or sensitive skin | Slow increases and frequent checks |
| Competitive player | Comfort over long practice days | Break in before tournament play |
The main takeaway is that walking distance matters as much as swing time. A shoe that feels fine for 20 swings may create a hot spot after 18 holes.
Check the Fit Before You Break In the Shoes
Breaking in a shoe cannot correct the wrong size or shape. First, confirm that the shoes fit your feet while you wear the socks used for golf.

Try both shoes. Feet are often slightly different in length and width. Stand up when checking the fit because the foot spreads under body weight. Walk, bend your knees, and make a slow practice swing.
Your heel should stay mostly in place. Your toes should have room to move. The upper should hold your foot without creating a sharp pressure point.
Use the Right Golf Socks
Golf socks can change the fit. Thin everyday socks may make a shoe feel loose. Thick socks may create pressure across the toe box or instep.

Use the sock thickness you expect to wear on the course. Choose a pair that has no large seam over the toes or heel. Moisture-wicking fabric can help reduce friction during a warm round, but it does not replace a proper fit.
Do not wear two pairs of socks to force a tight shoe to feel comfortable. That may increase pressure and heat. It can also hide a fit problem until the middle of a round.
Check the Toe Box, Heel, and Midfoot
The toe box is the front area of the shoe. The heel counter is the firm section that holds the rear of the foot. The midfoot includes the arch and instep area.

Use this simple check:
- Your toes should not touch the end when you walk downhill.
- Your heel should not lift sharply with each step.
- The midfoot should feel held, not crushed.
- Your little toe should not press hard against the side.
- You should be able to bend your toes slightly.
- Both shoes should feel similar, even if one foot is larger.
A golf shoe should not feel like a loose sneaker. It needs enough support for the rotational force of a full swing. It also should not feel like a clamp around the foot.
| Fit area | Comfortable sign | Warning sign |
|---|---|---|
| Toe box | Toes can spread and move | Numbness or toe pressure |
| Heel | Heel stays mostly in place | Repeated rubbing or lifting |
| Arch | Even support under the foot | Sharp pressure or cramping |
| Ankle collar | Secure without cutting in | Red marks or pain |
| Instep | Laces hold the foot | Tingling or tightness |
A small amount of firmness is normal. Numbness, burning, or sharp pain is not a normal part of breaking in a golf shoe.
A Safe Step-by-Step Break-In Routine
The best break-in plan moves from low stress to golf-specific movement. Each step gives you a chance to find problems before they become blisters or pain.

1. Inspect the Shoes and Read the Care Directions
Look at the seams, tongue, heel collar, insole, and outsole. Check for rough edges, loose threads, or debris inside the shoe. Read the care directions because leather, mesh, and synthetic materials may need different treatment.

Do not assume every FootJoy model responds to the same method. Some shoes use soft leather. Others use synthetic or mesh panels. Some have waterproof membranes or special sole structures. The care instructions for your exact model should guide cleaning and drying.
2. Wear Them Indoors for 20 to 30 Minutes
Put on your golf socks and wear the shoes at home. Walk on a clean, level surface. Stand in your golf posture, bend your knees, and make a few slow practice swings.

Keep the first session short. You are not trying to stretch the shoe as much as you are trying to learn how the shoe feels. Check your heel, little toes, big toes, arch, and ankle collar after the session.
If you find a hot spot, mark its location in your mind. A hot spot is an area that feels warm or irritated before a blister forms. Deal with it before taking the shoes onto the course.
3. Add Short Walks
If the indoor session feels good, wear the shoes for a 15- to 30-minute walk. Use level, clean ground. Avoid a steep hill or long trail during this stage.

Walking shows problems that standing does not. Your foot may slide forward on a slope. Your heel may rub after hundreds of steps. Your toes may press the front during a downhill walk.
A beginner should stop at the first sign of repeated rubbing. An experienced golfer may recognize a minor pressure point, but should still address it before a full round.
4. Practice at the Driving Range
Next, wear the shoes for a short range session. Start with a warm-up routine, then hit easy shots before full swings.

Begin with putting, chipping, and half-swings. These movements let you check balance without placing the same force on the shoes as a full driver swing. Then progress to pitching, irons, and longer clubs if your feet remain comfortable.
Pay attention to your stance. Are you changing your foot angle to avoid pressure? Are you standing too narrowly? Are you lifting your heel because the collar rubs? These signs may point to a fit or lacing issue.
5. Use Them for Nine Holes Before 18
A nine-hole round is a useful test. It gives you real tee boxes, fairways, rough, slopes, and green-side movement without the full walking load of 18 holes.

If you ride in a cart, walk short sections instead of staying seated all day. If you normally walk, consider a flatter course for this first round. An executive course may be a better test than a long course with steep hills.
Keep a spare pair of comfortable shoes available if course rules and conditions allow it. This is not a sign of failure. It is sensible planning while your feet and shoes adjust.
6. Increase Time Only When Your Feet Agree
After a comfortable nine holes, you can use the shoes for a longer practice day or full round. Do not increase distance and intensity at the same time.

For example, do not combine a new shoe with a long walking course, a hot day, a tournament, and a full swing session. That makes it hard to identify the cause of discomfort.
| Stage | Suggested time | Main check |
|---|---|---|
| Indoor wear | 20–30 minutes | Pressure and heel movement |
| Short walk | 15–30 minutes | Rubbing and toe movement |
| Easy practice | 30–60 minutes | Stance and balance |
| Nine holes | 2–3 hours | Repeated comfort |
| Full round | Several hours | Long-term fit and fatigue |
These time ranges are general. A player with sensitive skin, foot problems, or limited walking fitness may need a slower plan. A shoe that feels fine at one stage should still be checked again after the next stage.
Break-In Methods That Help Without Damaging the Shoe
Most golf shoes soften through normal use. Gentle movement is safer than extreme methods.
Flex the shoe lightly by hand if the material allows it. Do not fold it sharply or twist the sole. You can also walk indoors and make slow golf movements to help the shoe adapt to your natural foot motion.
If the shoe has laces, adjust tension in small steps. A tight lower lace can press the toes. A tight upper lace can create pressure over the instep. A loose heel area can cause slipping and friction.
Use a Gradual Lacing Pattern
Many golfers tighten every lace section with the same force. That may not suit the shape of your foot.
Try keeping the lower laces slightly more relaxed if your forefoot feels tight. Secure the middle and upper sections enough to hold the heel. If the shoe has a different closure system, follow its intended adjustment method.
Left- and right-handed golfers do not need different break-in methods. However, one foot may receive more pressure during the swing. A right-handed golfer may feel more stress on the inside of the trail foot or outside of the lead foot, while a left-handed golfer may feel the reverse.
Keep Leather and Synthetic Materials Dry
Moisture changes comfort and friction. Sweat can make the foot slide. Wet grass can add weight and slow drying.
After use, remove loose dirt and let the shoes dry at room temperature. Open the laces or closure to allow air into the shoe. Remove the insole only if the care instructions allow it and if doing so helps the inside dry.
Avoid a radiator, hair dryer, oven, or direct high heat. Heat can dry leather, weaken adhesives, deform synthetic parts, and change the fit.
💡 Pro Tip: A shoe often feels worse because of moisture, not because it needs more stretching. Let it dry fully between uses and compare the fit with dry socks.
| Method | Potential benefit | Limitation |
|---|---|---|
| Short indoor sessions | Finds pressure points early | Does not test long walking |
| Gentle walking | Helps materials move naturally | Takes several sessions |
| Lacing changes | Reduces local pressure | Cannot fix the wrong shape |
| Room-temperature drying | Protects structure and comfort | Needs more time than heat |
| Light hand flexing | May reduce initial stiffness | Too much force can damage the shoe |
The safest break-in method is slow and boring. That is useful. It lowers the chance of turning a small comfort issue into an injury.
A Seven-Day Break-In Plan
A simple schedule can help beginners and parents plan around practice. It also helps competitive players avoid testing new shoes right before an event.
The plan below assumes the shoes feel generally correct. If you have pain or strong pressure, stop and solve that issue first.
Days One and Two: Learn the Feel
Wear the shoes indoors for 20 to 30 minutes. Stand in your golf posture, take slow practice swings, and walk on a clean floor.
Check for heel slip, toe pressure, and rubbing. If the shoes feel fine, repeat the session the next day. Do not add a long walk just because the first session felt comfortable.
Days Three and Four: Add Golf Movement
Use the shoes for a short putting and chipping session. Add half-swings and a few controlled full swings if your feet remain comfortable.
This stage tests movement from putting through impact. Notice whether the foot slides inside the shoe when you rotate. Also check whether the sole feels stable when you finish the swing.
Days Five and Six: Test Walking
Take a 30- to 60-minute walk or play a short practice round. Choose a course or route that does not have steep slopes.
If you walk a links course, expect more uneven ground and firm turf. If you play a parkland course after rain, expect softer ground and more moisture. The shoe may feel different in each setting.
Day Seven: Decide on Full-Round Use
If the shoes remain comfortable after practice and walking, test them for nine holes. A full 18-hole round should come after that test, especially for golfers who walk.
| Day | Activity | Stop if you notice |
|---|---|---|
| 1 | Indoor wear | Sharp pressure or numbness |
| 2 | Repeat indoor wear | New rubbing |
| 3 | Putting and chipping | Foot sliding |
| 4 | Half-swings and easy irons | Pain during rotation |
| 5 | Short walk | Hot spots |
| 6 | Practice or short course | Blisters or fatigue |
| 7 | Nine-hole test | Pain that grows with time |
This schedule is a guide, not a rule. A junior golfer, senior golfer, or player returning from an injury may need more days. A player with no issues may move faster, but should still avoid a sudden jump to long walking.
Common Break-In Mistakes and Better Fixes
Many shoe problems come from rushing. Others come from trying to fix the wrong issue.
The most common mistake is wearing new golf shoes for a full 18-hole walking round. The shoe may feel fine for the first few holes, then create heat and friction as the feet swell.
Another mistake is using thick socks to soften a tight shoe. This often increases pressure. A better approach is to check the fit, adjust the laces, and use the correct sock thickness.
| Mistake | Why it causes trouble | Better response |
|---|---|---|
| Playing 18 holes first | Hides problems until late | Start with short sessions |
| Using high heat | Can damage materials | Dry at room temperature |
| Soaking the shoes | May harm structure and adhesives | Follow care directions |
| Ignoring hot spots | Can become blisters | Stop and inspect early |
| Over-tightening laces | Creates pressure and numbness | Adjust zones separately |
| Wearing poor socks | Adds friction and moisture | Use smooth golf socks |
| Forcing the shoe wider | May change support | Confirm fit or seek help |
Do Not Soak or Freeze Golf Shoes
Some old shoe tips suggest soaking, freezing, or stuffing shoes with wet material. These methods are not suitable for most modern golf shoes.
Water can affect leather, adhesives, waterproof layers, and internal padding. Freezing can stress materials and does not create a controlled fit. A golf shoe is built for movement, not for harsh treatment.
Do Not Use the Course as a Test Lab
A tournament, charity event, or important match is a poor place to test new footwear. Stress can make you ignore small pain until it changes your walk.
For match play, stroke play, Stableford, or a scramble, use shoes that have already passed a practice test. Golf shoes also need to meet the course’s dress and sole rules. Check local requirements before play.
📜 Check the Rules: The Rules of Golf do not set a general break-in period for shoes, but a club or competition committee may have local footwear policies. Check the latest Rules of Golf and the event or club requirements before a tournament.
How to Handle Hot Spots, Blisters, and Foot Pain
A hot spot is an early warning. It feels warm, tender, or irritated before the skin breaks.
Stop when you notice one. Remove the shoe and sock, inspect the skin, and let the area cool. A clean, protective dressing may reduce friction, but do not use a dressing to push through serious pain.
A blister is damaged skin. Keep it clean and protected. If it becomes very painful, red, swollen, warm, or filled with pus, seek medical advice.
Match the Problem to the Likely Cause
Heel rubbing often comes from heel movement, a loose fit, or a stiff collar. Toe pain may come from a short shoe, a narrow toe box, downhill walking, or laces that pull the foot forward.
Arch pressure may come from the insole or foot shape. Ankle rubbing may come from the collar, sock seam, or walking style. Do not assume every problem means the shoe needs more time.
| Symptom | Possible cause | First step |
|---|---|---|
| Heel blister | Heel slip or stiff collar | Check fit and upper lacing |
| Toe numbness | Tight toe box or laces | Loosen lower laces |
| Burning forefoot | Pressure or moisture | Stop, dry, and inspect |
| Arch ache | Insole or foot fatigue | Shorten sessions |
| Ankle redness | Collar friction | Check socks and collar |
| Foot sliding | Loose fit or wet sock | Adjust closure and dry feet |
If pain continues after you stop wearing the shoes, do not continue the break-in plan. Persistent foot, back, elbow, wrist, or knee pain deserves attention from a medical professional.
When a Shoe May Not Suit You
A break-in routine may not suit a golfer with an active blister, untreated foot condition, recent surgery, or major gait problem. It may also be unsuitable if the shoe causes pain during a normal indoor session.
Golf fitness can help your walking strength, ankle control, and balance, but exercise does not make a poor shoe fit safe. A PGA professional can help you assess stance and movement. A doctor or podiatrist can assess pain or foot structure.
Tips for Different Golfers
The right break-in pace depends on the golfer, not only the shoe. Age, foot shape, walking habits, climate, and handicap can all change the experience.
A beginner often needs extra time to notice how footwear changes balance. An improving player may notice pressure during a forceful downswing. A low-handicap player may need the shoes to feel stable during high-speed swings and long practice sessions.
Beginners and High-Handicap Golfers
Beginners should focus on comfort, balance, and safe walking. Start with putting, chipping, and short range sessions.
You do not need to hit a driver on the first practice day. Learn how the shoes feel during posture, grip setup, and a slow backswing. Then add full swings after you can keep your feet stable without discomfort.
A high-handicap golfer may play fewer greens in regulation and spend more time near the rough or around bunkers. That means walking over uneven areas can matter as much as time on the fairway.
Improving Amateurs
Improving golfers often practice more often and swing with more speed. Their shoes must handle repeated rotation and ground pressure.
Use the shoes for drills before a long session. Start with wedge shots, pitch shots, and three-quarter swings. Then work toward full irons and the driver.
If you are working on a swing change, do not change your footwear and swing at the same time if you can avoid it. Too many new sensations make it hard to know whether a problem comes from the shoe or the swing.
Seniors and Golfers Returning to Activity
Senior golfers may have less tolerance for foot pressure, joint stiffness, or long walking. Use shorter sessions, warm up the ankles and calves, and take breaks.
A warm-up routine can include ankle circles, gentle calf raises, marching in place, and easy body turns. Do not bounce into a stretch or force a stiff joint.
Golfers returning after an injury should follow medical advice. A shoe that feels stable may still place stress on a healing foot or knee.
Women’s, Men’s, and Junior Golf
Foot shape varies within every group. Gender labels do not replace a personal fit check. Women may have different heel-to-forefoot proportions on average, while men may have different width needs, but individual fit is the key issue.
Junior golfers need extra care because feet change as they grow. A child should not use an overly large shoe with the hope of getting more seasons from it. Excess space can cause sliding and affect balance.
Parents should watch for red marks, toe curling, complaints after practice, and changes in walking. Junior-sized equipment and shoes should support control without adding excess weight.
| Golfer | Useful focus | What may not suit |
|---|---|---|
| Beginner | Short practice and level walking | Full round as the first test |
| Improving amateur | Gradual swing intensity | Testing during a major event |
| Senior golfer | Warm-up and slower increases | Long walks without breaks |
| Junior golfer | Proper fit and close checks | Oversized shoes |
| High-speed player | Secure heel and midfoot | Loose closure |
| Sensitive-foot golfer | Moisture control and short sessions | Thick socks in a tight shoe |
Handicap does not determine foot shape. A scratch golfer and a 30-handicap golfer can need the same careful fit check.
Course, Weather, and Ground Conditions
The course can change how a new shoe feels. Turf, slopes, moisture, temperature, and walking distance all matter.
A dry, firm fairway may feel easy underfoot. Wet grass can increase friction between the sole and ground while also making socks and feet damp. A hilly course places more pressure on the toes during descents and on the heel during climbs.
A links course may have firm turf, uneven lies, and strong wind. A parkland course may have longer walks between holes. An executive course may have shorter holes but still require many steps.
Heat and Humidity
Feet can swell in hot weather. Sweat can increase friction and make the foot slide inside the shoe.
For a hot round, use moisture control, drink water, protect your skin from the sun, and take breaks in shade when possible. Do not ignore dizziness, confusion, cramps, or unusual weakness. Heat illness needs prompt attention.
Cold and Wet Conditions
Cold materials can feel firmer. Wet conditions can change grip and comfort. Allow the shoes to dry between uses.
Do not place wet shoes on direct heat. Remove mud and grass with a method allowed by the care directions. Clean shoes can also help protect course conditions and reduce the spread of soil between areas.
⚠️ Safety Warning: Leave the course at the first warning of lightning. Do not shelter under a tree or remain in an exposed golf cart. Foot comfort can wait; storm safety cannot.
| Condition | Effect on break-in | Useful adjustment |
|---|---|---|
| Hot and humid | More sweat and foot swelling | Shorter walks and dry socks |
| Wet turf | More moisture and friction | Dry shoes fully after use |
| Cold weather | Firmer materials | Longer warm-up, slower start |
| Hilly course | More toe and heel pressure | Test on slopes before a round |
| Firm links turf | Uneven, hard walking | Use a short trial first |
| Soft parkland turf | Mud and heavier steps | Clean and dry after play |
Course care also matters. Repair ball marks, replace divots, rake bunkers, keep pace of play, and dispose of broken tees, wrappers, and old balls properly.
Break-In and the Golf Swing
Footwear should support your natural movement without changing your swing plan. It should not force you to adjust your grip, stance, or posture.
During setup, place your feet in a balanced stance. Keep pressure spread across the feet rather than rocking onto the heels or toes. Make a slow backswing and check whether the shoe holds the ground.
During the downswing, the lead foot may accept more pressure as the body rotates. At impact, stable contact with the ground can help you control balance. In the follow-through, the trail heel may lift naturally, but the foot should not slide inside the shoe.
Practice From Short Shots to Full Shots
Chipping and putting use smaller movements. They are useful for learning how a shoe feels without large ground forces.
Pitching and bunker shots add more rotation and stance changes. Full irons and drivers add more speed. Progress in that order when breaking in a new pair.
Do not use shoe comfort to force a swing change. If you are trying to fix a slice or hook, focus on the lesson plan for grip, clubface, swing path, and contact. The shoe only provides the base.
Walking Versus Swing Stability
Some golfers think a shoe must feel soft to be comfortable. Others choose a very firm feel because they like stability. The best balance depends on foot shape, walking needs, and swing demands.
A walking golfer may prefer a forgiving feel under the heel and forefoot. A player with a fast swing may focus more on secure lateral support. A senior golfer may need comfort during long walks, while a junior golfer may need light weight and control.
No single feel suits every player. Test the shoe through the movements you actually use.
When to Ask for Professional Help
A golf shoe problem is often simple, but persistent pain should not be treated as a normal break-in stage.
Ask a PGA professional about swing-related movement if you keep changing your stance, lifting a heel, or losing balance after checking the fit. A teaching professional can watch your posture, foot pressure, and finish.
Ask a doctor or qualified medical provider about pain that continues after rest. This is especially important for swelling, numbness, joint pain, recurring blisters, or pain that changes your walking pattern.
A fitter or foot-care professional may also help if your feet differ greatly in size, width, arch shape, or pressure pattern. The goal is not to force your foot to match the shoe. The goal is to protect comfort and movement.
Frequently Asked Questions
Q: How long does it take to break in FootJoy golf shoes?
A: Many golfers can adjust to a new pair over several short sessions. Some need only a few days, while firm materials, sensitive feet, or long walking may require more time. Comfort should guide the pace, not a fixed deadline.
Q: Can I wear new FootJoy golf shoes for 18 holes right away?
A: It is safer to test them indoors, during a short walk, and in practice before a full round. A nine-hole test is useful for walking golfers. A full round can expose rubbing and pressure that do not appear during a short session.
Q: Should golf shoes feel tight at first?
A: They may feel firm, but they should not feel painfully tight. Your toes need room to move, your heel should remain mostly secure, and the midfoot should feel supported without numbness or burning.
Q: Can I use a hair dryer to soften FootJoy shoes?
A: Avoid high heat. It can damage leather, adhesives, waterproof layers, and synthetic materials. Let the shoes soften through normal use and dry at room temperature.
Q: Should I wet leather golf shoes to break them in?
A: No. Soaking can change the shape and damage parts of the shoe. Follow the care instructions for the exact model and use gradual wear instead.
Q: Why do my new golf shoes hurt my heels?
A: Heel pain may come from heel slip, a stiff collar, poor socks, moisture, or an incorrect fit. Check the lacing and walking pattern, but stop if the skin becomes sore or damaged.
Q: Why do my toes hurt when I walk downhill?
A: Your foot may slide forward, or the toe box may be too short or narrow. Loosen the lower laces slightly, check your socks, and test the shoes on a slope before playing a long course.
Q: Do men’s and women’s FootJoy golf shoes break in differently?
A: The basic process is the same. The main difference is individual foot shape and fit. Use the correct size and width for the golfer, then break in the shoes with short, controlled sessions.
Q: How should parents break in golf shoes for junior players?
A: Start with brief indoor wear and a short practice session. Check for toe pressure, heel movement, red marks, and complaints after play. Do not use oversized shoes as a substitute for proper fit.
Q: Can I play in new golf shoes if I ride in a cart?
A: You may place less walking stress on the shoes, but you still need to test swing stability and comfort. Cart paths, slopes, and walks around greens can still create rubbing.
Q: Do waterproof FootJoy shoes need a longer break-in?
A: Not always. The materials and construction may feel different from a lightweight shoe, but the correct method remains gradual wear. Follow the care directions and avoid heat or soaking.
Q: Can new golf shoes change my swing?
A: They can change how your feet feel at setup, but they should not require a major swing change. If you alter your stance or balance to avoid pain, stop and check the fit.
Q: Are new golf shoes allowed in stroke play or match play?
A: Golf shoes are generally subject to course and competition requirements rather than a break-in rule. Check the latest Rules of Golf, local rules, and the committee’s footwear policy before an event.
Q: Should I wear golf shoes at the driving range before a round?
A: Yes, a short range session can reveal pressure points and foot sliding. Start with putting, chipping, and half-swings before moving to full shots.
Q: What is a good way to prevent blisters during the break-in period?
A: Use the correct golf socks, keep feet dry, adjust the laces, and stop at the first hot spot. Do not cover a serious fit problem and continue walking for hours.
Final Thoughts
Breaking in FootJoy golf shoes is less about forcing the material to change and more about giving your feet time to adapt. Start indoors, use short walks, add golf practice, and test nine holes before a long round.
Check the toe box, heel, arch, and ankle collar at every stage. Keep the shoes dry, avoid high heat and soaking, and stop if pain appears. These habits suit beginners, improving amateurs, seniors, women, men, juniors, and competitive golfers because they focus on fit and gradual use rather than speed.
Comfort is part of sound golf preparation. When your feet feel secure, you can give more attention to posture, tempo, impact, course management, and pace of play. Let the break-in process be steady, simple, and guided by your own feet.