How To Build A Golf Simulator Enclosure: Quick DIY
Build a safe, quiet, and accurate golf simulator enclosure using basic carpentry, netting, and a quality impact screen.
I’ve built several home setups and coached golfers who use simulators. This guide explains how to build a golf simulator enclosure from planning to final tuning. You will get clear steps, material lists, common mistakes, and real tips from hands-on experience. Read on to make a durable, safe, and fun simulator enclosure that fits your space and budget.

Why build a golf simulator enclosure?
Building a golf simulator enclosure protects walls, improves ball tracking, and creates a realistic hitting area. A proper enclosure keeps balls safe, reduces noise, and improves image quality by providing a flat impact screen. Many people start with a cheap net and later upgrade to a pro-quality setup. If you want reliable play and long-term value, build the enclosure right the first time.

Plan your space and design
Good planning saves time and money. Start by measuring the room. Know the ceiling height, width, and depth. Most simulators need at least 10 feet of ceiling and 10–12 feet of depth for full swings. Smaller spaces work with limits on club choice.
Consider these design points:
• Sightlines and projector placement. Place the projector so it won’t be hit.
• Screen type and frame. Decide between impact screen, net, or padded wall.
• Flooring. Choose turf, mat, or a raised platform.
• Sound and safety. Add padding and netting to protect walls.
• Access and storage. Allow room to enter and carry clubs.
This planning step sets the stage for materials, labor, and cost. Sketch a layout and list exact dimensions before buying anything.

PAA-style questions
What height do I need for a golf simulator enclosure?
Most home builds need 8.5 to 10 feet clear height for comfort and safe full swings. Taller is better for driver shots.
Can I use a garage for a golf simulator enclosure?
Yes. Many use garages. Insulate, level the floor, and ensure enough depth and ceiling height.
Is a full enclosure required for a launch monitor?
No. Short-range launch monitors can work with nets, but a full enclosure improves accuracy and image quality.
Materials and tools checklist
Gathering the right parts speeds the build. Below is a common materials list for how to build a golf simulator enclosure.
Essential materials:
• Impact screen rated for ball speeds.
• Steel or wood frame materials (2x4s, 4×4 posts, or aluminum extrusions).
• Netting and ballistic padding for side and back protection.
• Ceiling padding and trim.
• Artificial turf mat for the hitting area.
• Projector mount or bracket and a projector with enough lumens.
• Launch monitor or simulator hardware.
• Fasteners, lag bolts, anchors, screws, and corner braces.
• Acoustic foam or curtains for sound control.
• Cable conduits and grommets for wiring.
Common tools:
• Drill, circular saw, level, tape measure, stud finder.
• Staple gun, impact driver, and wrench set.
• Ladder and safety gear (glasses, gloves).
Choose quality where safety matters: frame, screen, and padding. I learned to never skimp on the impact screen. A weak screen tears and costs more long term.

Step-by-step build process
Follow these steps to build a reliable enclosure. I write them from my hands-on builds.
-
Prepare the room
• Clear the area and protect floors.
• Verify ceiling height and mark screen center on the floor. -
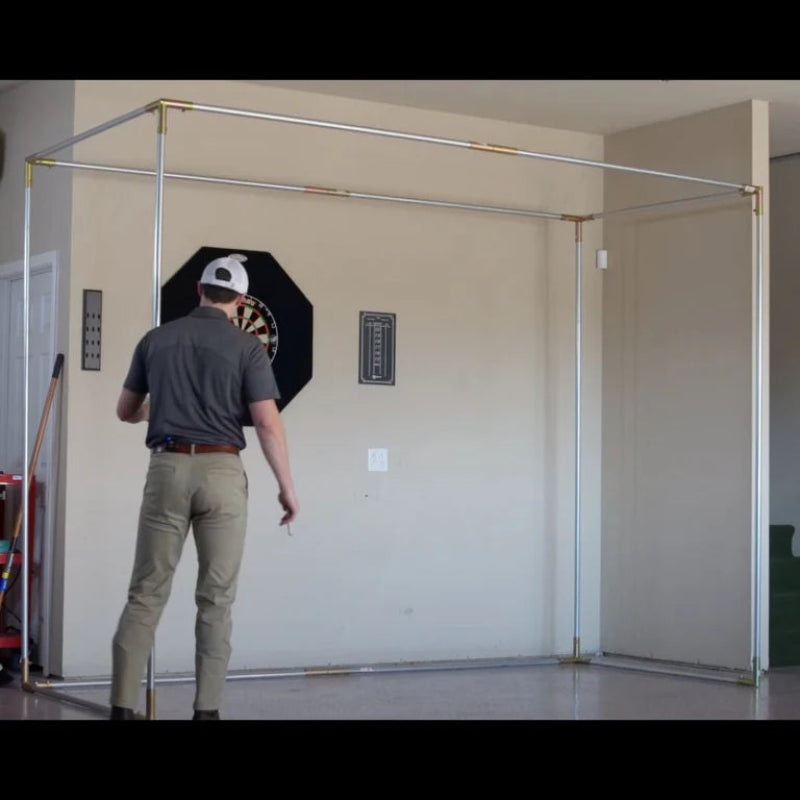
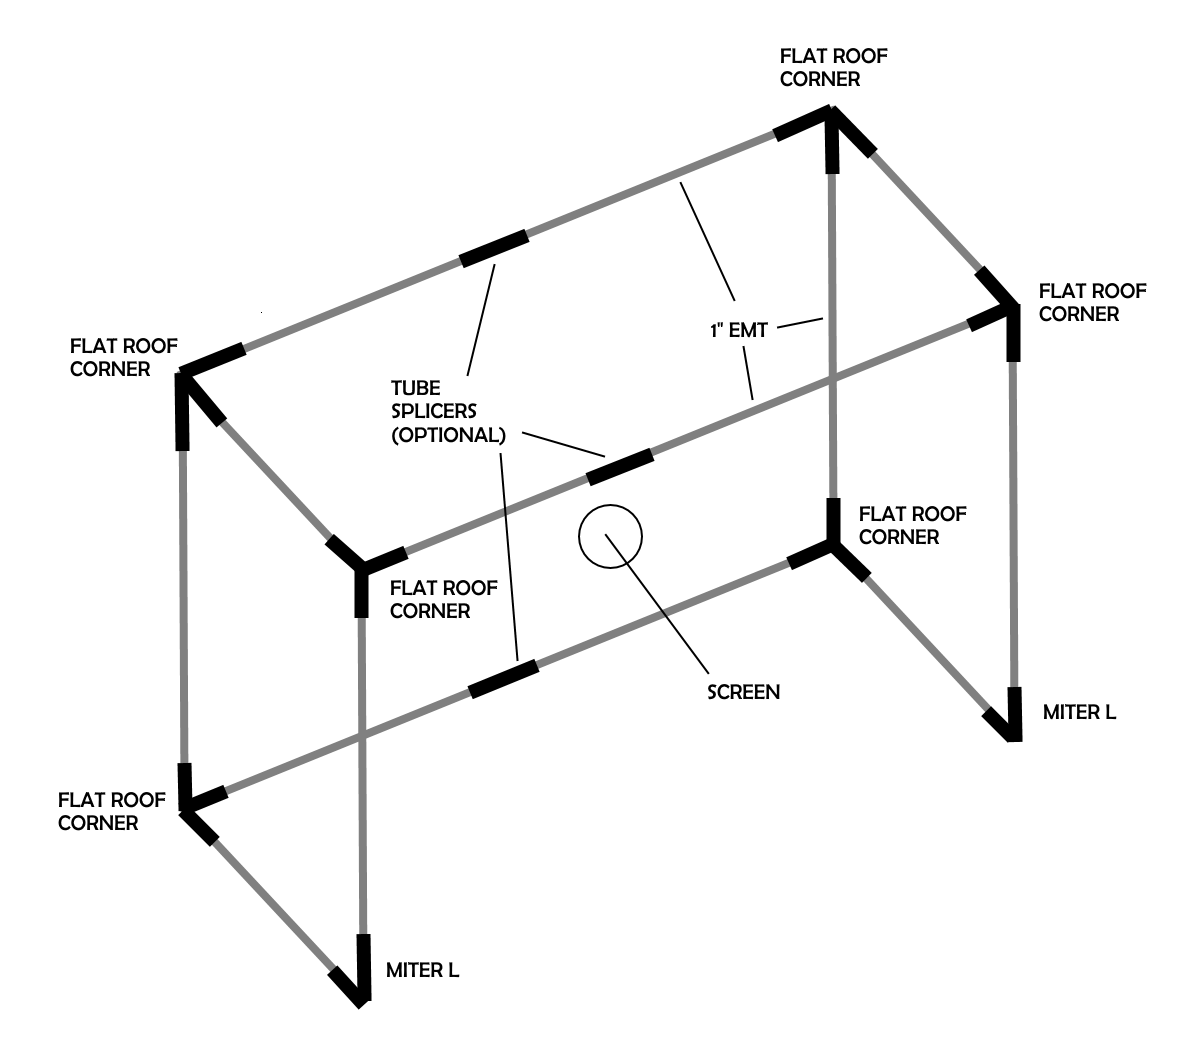
Build the base frame
• Use pressure-treated wood or metal for the base.
• Square the frame and anchor it to the floor if possible. -
Erect side and top frames
• Fasten vertical posts and a top beam.
• Ensure the frame is plumb and level.
• Reinforce corners with metal brackets. -
Install back netting and padding
• Hang ballistic netting behind the screen to catch stray shots.
• Add foam padding to posts and walls for safety. -
Mount the impact screen
• Attach the screen smoothly to the frame using bolts or clamps.
• Keep the screen flat; wrinkles affect image and ball rebound. -
Set up projector and mount
• Mount projector on the ceiling or behind the hitting line based on throw distance.
• Run cables through conduits and secure them. -
Place hitting mat and tee area
• Install turf or a commercial mat.
• Make the mat level and at proper height relative to the screen. -
Calibrate launch monitor and image
• Position the launch monitor per manufacturer specs.
• Adjust projector alignment and keystone settings. -
Test and refine
• Start with soft wedge shots to check rebounds and tracking.
• Tune padding, net tension, and projector focus.
Keep steps small and test as you go. That stops big fixes later.
Safety, acoustics, and lighting
Safety is a top priority. A secure enclosure prevents injuries and damage. Good sound treatment keeps neighbors happy. Proper lighting improves image and play.
Safety tips:
• Use high-strength netting behind and to the sides.
• Pad all exposed posts and beams.
• Anchor frames to floor or studs to prevent tipping.
• Ensure fire-safe materials if local codes require.
Acoustics:
• Install acoustic panels or heavy curtains to reduce impact noise.
• Foam panels behind the screen also help with sound and image contrast.
Lighting:
• Use dimmable room lights or indirect LED strips.
• Avoid lights that cause screen glare.
• Blackout curtains help control ambient light for daytime play.
I once underestimated noise in a concrete basement. Adding dense foam cut noise by half and made play far more enjoyable.

Common mistakes and how to avoid them
Learn from common errors to save time and money.
Mistakes to avoid:
• Underestimating ceiling height. Test full swings before finalizing.
• Using a cheap screen that tears or distorts image. Invest in a crisp impact screen.
• Poor frame anchoring. Secure the frame to floor or studs.
• Ignoring projector throw and placement. Measure throw distance before buying projector.
• Skipping padding or netting. Safety matters most.
Practical tips:
• Mark the swing circle on the floor to test space.
• Buy a slightly larger screen than you think you need.
• Keep wiring tidy and out of the swing area.
• Use adjustable mounts for projector and launch monitor.
From my builds: test with soft shots first. I repaired fewer panels that way.
Budget and timeline
Costs vary with quality. Here is a simple breakdown for how to build a golf simulator enclosure.
Rough cost ranges:
• Basic DIY enclosure with net and mat: $500–$1,500.
• Mid-range with impact screen, projector, and launch monitor: $3,000–$10,000.
• High-end custom room with pro-grade screen and hardware: $15,000+.
Time estimate:
• Planning and shopping: 1–2 weeks.
• Build and install: 2–5 days for DIY; longer for custom work.
• Calibration and testing: 1–2 days.
Plan for delays on custom parts. Allow extra time to fine-tune projector and launch monitor settings.

Troubleshooting and upgrade ideas
Problems happen. Here are fixes and upgrades to improve your setup.
Common issues and fixes:
• Image keystone or blur: Re-mount projector or use a short-throw lens.
• Poor tracking: Reposition launch monitor and clear marker lines on turf.
• Excessive bounce: Add heavier padding or different screen backing.
• Echo and noise: Add more acoustic panels.
Upgrade ideas:
• Switch to a higher-lumen projector for brighter images.
• Add side curtains to reduce glare and improve realism.
• Install a ceiling-mounted camera system for club path analysis.
• Use a professional-grade impact screen for better durability.
I upgraded my projector after year one. The image clarity made practice much more useful.
Frequently Asked Questions of how to build a golf simulator enclosure
How high should the ceiling be for a golf simulator enclosure?
Most people need at least 8.5 to 10 feet for comfortable full swings. Taller ceilings are preferred for driver use and feel more open.
Can I build an enclosure in a two-car garage?
Yes. A two-car garage usually has the space needed, but check ceiling height and door clearance. Insulate and add a level floor or mat for best results.
Do I need a special impact screen?
A quality impact screen improves image sharpness and absorbs ball energy safely. Cheap screens may sag, tear, or blur the projector image.
How much does a DIY simulator enclosure cost?
A basic DIY enclosure can start around $500, while a full system with good hardware typically runs $3,000 to $10,000. Costs depend on screen, projector, and launch monitor choices.
Is it hard to install the projector and launch monitor?
Installation is straightforward with planning. Follow manufacturer specs for throw distance, height, and alignment, and test with soft shots first.
Conclusion
Building a golf simulator enclosure is a rewarding DIY project. With clear planning, the right materials, and careful assembly, you can make a safe and accurate space for practice and fun. Start with good measurements, invest in a solid screen and frame, and test often. Take one step today: sketch your room, list materials, or buy the impact screen. Leave a comment with your room size or questions, and subscribe for more hands-on tips.