How To Customize Golf Shoes: Easy DIY Guide
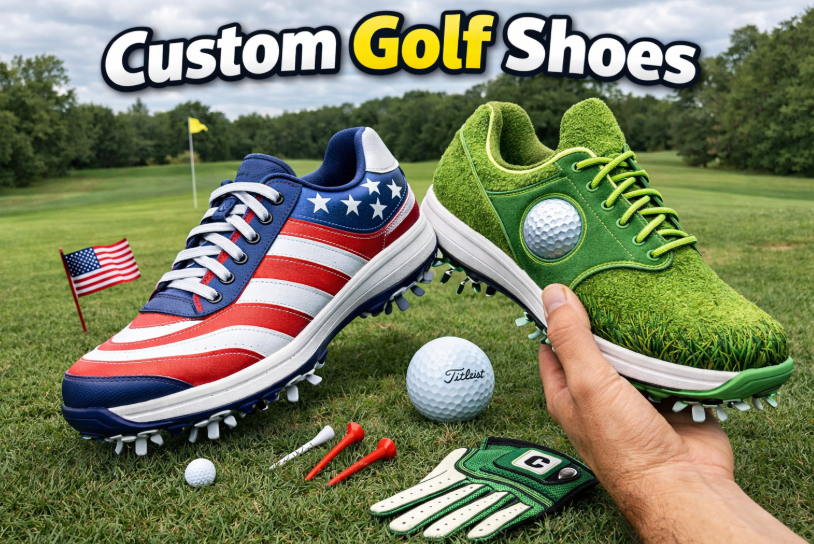
Golf shoes do more than complete a golf outfit. They help your feet stay stable during the backswing, downswing, and follow-through. They also protect your feet during long walks across wet fairways, rough, slopes, and firm paths. Customizing them can make your shoes feel more personal while also improving comfort and course awareness.
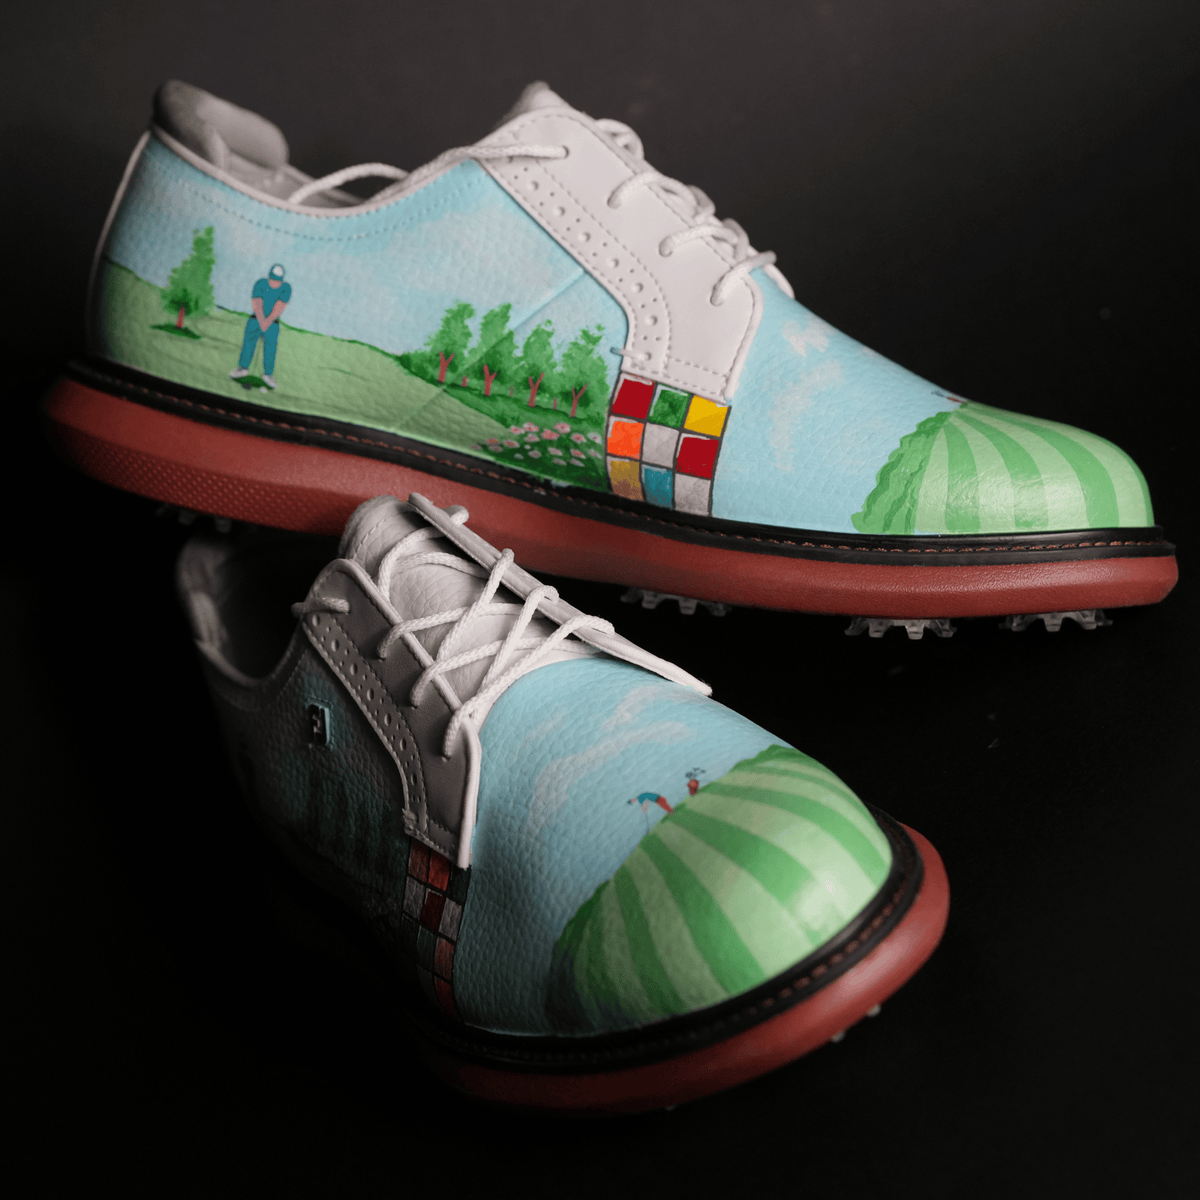
The safest approach is to customize parts that do not change the shoe’s grip, balance, waterproofing, or support. Good options include color, laces, removable tags, small painted details, and personal marks. Changes to the sole, cleats, heel, or internal support need more care. A small design project should not create a larger foot, safety, or rules problem.
This guide explains how to customize golf shoes for beginners, junior golfers, women, men, seniors, walkers, and players who ride. It also covers left- and right-handed golfers, wet and dry weather, practice areas, and tournament play. You will learn what to change, what to avoid, how long each method may take, and when a PGA professional or shoe specialist can help.

Quick Answer: How do you customize golf shoes?
The best way to customize golf shoes is to start with low-risk changes such as laces, removable decorations, color accents, initials, or small artwork on clean shoe panels. Keep the sole, cleats, tread, heel, and support structure unchanged. Use flexible, water-resistant materials that do not crack or rub the skin. Before competition, check the latest Rules of Golf and local committee rules.

Customization should match the golfer and the course. A beginner may need comfort and easy cleaning. A junior may need light shoes with enough room for growth. A senior or golfer with foot pain may need stable support rather than a thick decoration. A competitive player should focus on changes that do not affect equipment conformity.
Why customize golf shoes?
Custom golf shoes can help a golfer express style, identify a pair quickly, and improve comfort through careful fit changes. They can also support team identity, junior golf memories, or a simple mental cue before a round. Yet customization is not a substitute for correct golf posture, stance, grip, or footwork.
A golf shoe works as part of the swing. Your feet connect your body to the ground. During the backswing, pressure often moves toward the trail foot. During the downswing, pressure shifts toward the lead foot. A shoe that slips, pinches, or twists can distract you from balance and impact.
Customization suits different golfers in different ways:
- Beginners: Choose simple color changes and comfort checks.
- Improving amateurs: Use personal marks to tell pairs apart and maintain focus.
- Junior golfers: Add safe, removable details that reflect personality.
- Senior golfers: Protect room for the toes and avoid changes that reduce support.
- Walkers: Keep the shoe light, flexible, and free from hard edges.
- Tournament players: Confirm that changes do not affect conformity or local rules.
Customization can also help families. A parent can mark a junior’s left and right shoes with clear symbols. This can make dressing easier and reduce confusion at junior events. The mark should not replace teaching basic golf etiquette, such as keeping pace, repairing ball marks, and caring for the course.
Style is useful, but function comes first
A bright color or custom design may look sharp, but a golf shoe still needs to support a stable stance. The shoe should bend near the ball of the foot, hold the heel without lifting, and allow the toes to spread. It should not force the foot inward or outward.
A golfer with a high handicap may notice comfort more than appearance during a four-hour round. A low-handicap player may notice small changes in balance during a full swing. Both golfers should test the customized shoes during practice before using them in stroke play or match play.
Know the parts of a golf shoe
Before you customize golf shoes, learn the parts that affect fit, traction, and comfort. The upper covers the top and sides of the foot. The midsole cushions the foot. The outsole contacts the ground. Cleats, spikes, or molded traction elements connect the shoe to the turf.

The toe box is the front area around the toes. The heel counter helps hold the heel in place. The tongue sits below the laces. The insole rests inside the shoe. The outsole is the lower layer that faces the ground.
These terms matter because some areas are safer to decorate than others. A flat side panel may accept a small design. A heel counter may not. A sole may look like a blank canvas, but changing it can affect traction, walking comfort, and course care.
| Shoe area | Safer customization | Areas of caution |
|---|---|---|
| Side panel | Color, initials, small artwork | Paint must stay flexible |
| Tongue | Laces, small fabric mark | Avoid thick or hard items |
| Heel | Small flat design | Do not alter heel support |
| Toe box | Light color detail | Do not reduce toe space |
| Insole | Removable flat mark | Do not change arch support |
| Outsole | Usually leave unchanged | Traction and rules concerns |
The main takeaway is simple: customize the upper before the lower part of the shoe. The closer a change is to the ground or the foot’s support system, the greater the risk.
Upper, midsole, and outsole differences
The upper is often the best area for visual work. It usually has enough surface area for a small logo, stripe, pattern, or name. The material may be leather, synthetic material, mesh, or a blend, so any color method must match the surface.
The midsole affects cushioning and stability. It may compress with use. Hard paint or thick tape can crack as the shoe bends. The outsole affects contact with grass, sand, paths, and wet ground. Avoid making permanent changes there unless a qualified shoe repair professional confirms that the change is safe.
Spikes, cleats, and traction
Spiked shoes use replaceable spikes or cleats. Spikeless shoes use molded patterns or rubber traction areas. Both types need clean, even contact with the ground.
Never cover traction with paint, glue, thick stickers, or fabric. Do not add sharp objects or homemade spikes. These changes can damage greens, increase slipping, or cause injury. They may also conflict with course policy or the Rules of Golf.
Choose a customization plan
The best customization plan starts with the golfer, not the decoration. Think about the shoe’s use, the course, the weather, and the player’s foot needs. A walking golfer on a hilly course needs a different plan from a golfer who rides on a dry executive course.

Ask these questions before starting:
- Will the shoes be used for practice, casual play, or competition?
- Will the golfer walk or ride?
- Are the shoes used in rain, heat, cold, or dew?
- Does the golfer have wide feet, sensitive skin, or a history of blisters?
- Does the player need a left- or right-foot mark?
- Can the change be removed if it causes a problem?
- Could the change affect grip, balance, or rules status?
A small, removable change is usually the best starting point for a beginner. A permanent paint design may suit an experienced hobbyist who understands the shoe material. A structural change should be left to a trained professional.
| Golfer or use | Useful focus | Avoid |
|---|---|---|
| Beginner | Simple marks, clean colors, comfort | Thick decorations |
| Junior | Light, removable details | Tight changes that limit growth |
| Senior | Room, support, easy cleaning | Hard edges and bulky inserts |
| Walker | Light weight, smooth seams | Heavy charms or loose parts |
| Wet climate | Flexible, sealed artwork | Materials that trap water |
| Tournament player | Subtle, conforming changes | Sole or traction changes |
Customization should not add enough weight to change your walking pattern. It should also not create noise, loose parts, or distractions during a swing.
Prepare the shoes before customizing
Preparation determines how well a custom design stays in place. Clean the shoes with a soft brush and a damp cloth. Remove grass, sand, mud, and old polish. Let the shoes dry fully at room temperature before applying any material.
Do not place wet shoes near a heater or strong heat source. High heat can warp synthetic panels, harden leather, and weaken glue. This matters for new golfers and juniors, who may place wet shoes beside a radiator without knowing the risk.
Check the shoes for damage before you begin. Look for:
- Loose stitching
- A separating sole
- Cracked material
- Worn tread
- Damaged cleats
- A loose heel counter
- Rough internal seams
- Water entering through a seam
A design cannot fix a support problem. If the shoe already twists, pinches, or slips, speak with a qualified shoe specialist or PGA professional about the fit before adding decoration.
Make a small test area
Test any color, adhesive, or sealant on a hidden area first. Wait for it to dry. Bend the material by hand and check for cracking, peeling, stickiness, or color transfer.
This step suits every golfer, but it is especially important for children and players with sensitive skin. A material that feels fine on the outside may become rough after drying. Place a clean sock on the foot and walk indoors for several minutes before using the shoes on a course.
Gather a simple work area
Use a clean table with good light. Keep the shoes away from food, pets, and children who may touch wet materials. Cover the table with paper or a washable cloth.
A basic work area may include:
- A soft brush
- A clean cloth
- Low-tack masking tape
- A pencil or removable marker
- Flexible color material made for the shoe surface
- Small scissors
- A soft shoe brush for final cleaning
Use ventilation when working with strong-smelling materials. Follow the safety label. Do not use a material near an open flame or in a closed room.
Step-by-step: customize golf shoes safely
A careful process gives better results than a rushed one. Plan the design, protect the fit, and test the finished shoes before a round. The steps below suit most beginners and can also guide advanced custom work.

1. Decide what kind of customization you need
Choose one main purpose. You may want a visual design, easier identification, improved lace control, or a personal reminder. Avoid trying to change color, structure, traction, and fit at the same time.
For example, a junior golfer may need a name mark and left-right symbols. A walking golfer may want a smoother lace setup. An improving amateur may want a small color cue that matches a team or club.
Write down the design before touching the shoes. A simple sketch can prevent crowded details and help you keep both shoes balanced.
2. Mark the design lightly
Use a removable pencil or low-tack tape to outline the design. Keep the mark away from flex points, seams, eyelets, and the toe crease. A design that crosses a flex point may crack or rub during a round.
Keep the design balanced on both shoes unless the purpose is identification. For example, a left-foot symbol and right-foot symbol can be different. A painted pattern should usually match in size and weight.
3. Protect the functional zones
Cover the sole, cleats, tread, lace holes, and any opening used for drainage. Do not block vents or flexible areas. Do not cover the inside of the heel or the edge of the tongue with hard material.
The foot needs room to move. A thick design can reduce space over the toes. This is a common mistake for wide-footed golfers, seniors, and juniors.
4. Apply thin layers
Thin layers bend better than one thick layer. Let each layer dry before adding another. Use light pressure and keep the material away from the shoe’s flex crease.
Thin work also lowers the chance of creating hard ridges. Hard ridges can cause blisters during walking. They may also distract a golfer who spends several hours moving from the tee box to the green.
5. Let the shoes cure fully
Drying time and curing time are not always the same. A surface may feel dry while the material below remains soft. Follow the material instructions and give the shoes extra time if the air is cool or humid.
Do not play a full round until the design feels smooth and stable. Walk indoors first. Then test the shoes on a driving range or short practice session. A nine-hole round may be enough for a first outdoor check.
6. Flex and inspect the shoes
Bend the forefoot by hand. Twist the shoe gently. Check the heel, toe, sides, tongue, and sole. Look for cracks, loose edges, tacky spots, or changes in the way the shoe bends.
Put on both shoes with the golf socks you normally wear. Stand in your golf posture. Make slow practice swings. Then try a few full swings at a safe practice area. Stop if the shoes slip or the foot feels trapped.
7. Clean and store them correctly
After play, remove grass and mud with a soft brush. Let the shoes air dry. Do not seal damp shoes in a bag. Moisture can weaken adhesives and create odor.
Store the shoes with the tongue open and the laces loose. This helps preserve the shape. Keep custom shoes away from sharp tools, direct sun, and heat.
Ways to customize golf shoes
Golfers can customize shoes in many ways without changing their basic function. The safest options are flat, flexible, light, and easy to remove. Choose a method based on skill level and use.

Change the laces
Laces are one of the simplest changes. They can add color and help identify each pair. Use the same length and tie the same knot each time. A loose lace can catch on a cart pedal or cause a trip.
The lace pattern can also affect pressure. A golfer with a high instep may need less pressure over the middle of the foot. A golfer with a narrow foot may need a more secure hold. Do not lace so tightly that the toes go numb.
For junior golfers, teach them to tuck the knot safely. For seniors, choose a setup that is easy to tie and easy to check. For walkers, check the knot at the turn and after long downhill sections.
Add initials or a name mark
A small name mark can prevent confusion during junior events, group outings, or family rounds. Place it on a flat side panel. Keep it away from the toe crease and the shoe opening.
Use a mark that does not bleed when wet. A simple letter or symbol is often better than a large design. The mark should remain smooth when touched.
Add color details
Color blocks, lines, and small patterns can change the look of a shoe without adding much weight. Keep the design away from areas that bend often. Use a flexible color method that matches the upper material.
Light colors may show grass and mud more clearly. Dark colors may absorb more heat in strong sun. In hot climates, avoid covering large areas with dark material if the shoe already feels warm.
Use removable decorations
A removable tag or flat fabric detail can suit casual rounds and team events. It should attach securely and remain flat. Do not use dangling pieces, sharp pins, metal charms, or loose clips.
This option may not suit a tournament player or a golfer who walks through thick rough. Loose parts can fall off and become litter. They can also catch on branches, cart parts, or another player’s equipment.
Customize the insole with care
A removable insole mark can help identify the shoe or add a small personal touch. It should not change the arch height, heel angle, or cushioning. Avoid adding layers under the heel or forefoot.
This point matters for golfers with foot pain, flat feet, high arches, or previous injuries. Even a small change inside the shoe can affect posture and balance. If you need support, seek professional advice rather than using decoration as a substitute.
| Method | Best for | Main risk |
|---|---|---|
| New laces | Beginners and juniors | Loose knots or excess length |
| Small initials | Families and teams | Ink bleed or rough edges |
| Flat color detail | Personal style | Cracking at flex points |
| Removable tag | Casual rounds | Loose parts or snagging |
| Insole mark | Pair identification | Changed support or pressure |
| Sole decoration | Rarely suitable | Slipping, damage, or rules concern |
The safest methods are usually laces, small marks, and flat color details. The less a change affects the foot or ground, the easier it is to test and remove.
Customization by shoe material
The shoe material changes how you should prepare and decorate it. Leather, synthetic panels, mesh, and rubber do not bend or absorb moisture in the same way.
Leather golf shoes
Leather may accept a smooth design, but it needs gentle cleaning and flexible treatment. Avoid soaking the material. Do not place heavy color layers over deep creases.
Leather can dry and stiffen if exposed to too much heat. A stiff toe area may limit the natural bend of the foot during walking. This can bother seniors and golfers with sensitive toes.
Synthetic golf shoes
Synthetic material may resist water and stains. It can also reject some colors or adhesives. Test first. A surface that looks smooth may have a coating that causes peeling.
Keep designs thin. Check the shoe after bending it several times. If the design becomes brittle, remove it before play.
Mesh golf shoes
Mesh allows air to pass through. It can feel cool in hot weather, but it is easy to block with thick material. Keep decoration small and avoid covering large vents.
Mesh may suit walkers in warm climates. It may not suit a golfer who often plays in wet grass unless the shoe has enough protection. Customization cannot turn a breathable shoe into a waterproof one.
Rubber and molded areas
Rubber may flex well, but it can be hard to color evenly. More important, rubber often forms part of the traction system. Leave the outsole and tread alone.
| Material | Helpful approach | What to watch |
|---|---|---|
| Leather | Small, flexible design | Heat and stiffness |
| Synthetic | Test on a hidden spot | Peeling and poor adhesion |
| Mesh | Use small details | Blocked airflow |
| Rubber upper | Keep work light | Uneven color |
| Molded outsole | Leave unchanged | Traction and safety |
No material should be customized without a test. If you cannot tell what the surface is made of, ask the maker or a qualified repair professional.
Foot fit, walking, and golf performance
Custom golf shoes should preserve natural foot movement. Your toes should not curl. Your heel should not lift with each step. Your foot should feel held, not squeezed.

A stable shoe can support a balanced golf stance. A stance is the position of your feet before the swing. Your feet should give you a steady base while your grip, posture, backswing, downswing, impact, and follow-through work in order.
Do not expect customized shoes to correct a slice, hook, poor tempo, or weak contact. Those faults usually relate to the club path, face angle, grip, posture, or timing. A shoe can help you feel stable, but it cannot replace a sound lesson or focused practice.
Walking versus riding
Walkers place more stress on the sole, heel, and forefoot. They may cover five or more miles over a full course, depending on the layout and route. A custom detail that feels harmless for nine holes may rub after 18.
Golfers who ride may still walk from the cart path to the ball. They also face cart safety concerns. Keep laces secure, and never place loose decorations near pedals, wheel areas, or moving parts.
Weather and course type
Wet fairways, dew, and soft ground can expose weak traction. Dry links courses may have firm, rolling ground and strong wind. A hilly course places more demand on balance. An executive course may involve less walking but still require careful movement around slopes and paths.
| Condition | Shoe concern | Customization response |
|---|---|---|
| Heavy dew | Wet upper and slipping | Keep design sealed and light |
| Rain | Water entry and soft ground | Do not block drainage |
| Hot sun | Heat and sweat | Avoid large dark coverings |
| Cold weather | Stiff materials | Test flexibility before play |
| Hilly course | Balance and heel hold | Avoid changes near the heel |
| Links course | Firm ground and wind | Keep traction unchanged |
| Soft fairway | Mud and cleaning | Use easy-to-clean surfaces |
The best customization for changing weather is often no structural change at all. Preserve traction, flexibility, and drainage. Check the forecast and course conditions before choosing shoes for a round.
Rules and etiquette for customized golf shoes
Golf shoes are equipment, so a customized pair should not create an unfair aid or damage the course. The Rules of Golf are maintained by the USGA and R&A. Rules and local conditions can change, so check the latest rulebook and the committee in charge of the event.

A design on the upper is usually less concerning than a change to the sole or traction. However, a tournament committee may have a dress code or equipment policy. Some facilities also restrict certain spike types or require soft, course-friendly traction.
Do not use customization to create an alignment aid. An alignment aid is a feature that helps aim the body or club in a way the rules may restrict. A large line across the shoe, a special raised edge, or a feature designed to guide foot placement could raise questions.
| Situation | Possible issue | Sensible action |
|---|---|---|
| Upper color change | Usually visual only | Keep it flat and flexible |
| Raised sole feature | May affect stance or turf | Avoid without expert review |
| Sharp traction change | Safety and course damage | Do not use |
| Large alignment mark | Possible rules concern | Ask the committee |
| Loose decoration | Litter or distraction | Remove before play |
| Local dress rule | Facility policy | Check before the round |
The main takeaway is to keep customization cosmetic and nonfunctional. When in doubt, ask the tournament committee before teeing off. A rules official can give a better answer than guesswork.
Course care still matters
Customized shoes do not change golf etiquette. Repair ball marks on the green. Replace or fill divots when allowed. Rake bunkers and leave the rake as the course directs. Keep pace of play and dispose of broken tees, wrappers, and old balls properly.
Clean mud from shoes away from the putting surface when possible. Heavy clumps can damage delicate turf. A course superintendent works to keep grass healthy, so players should avoid dragging feet or taking unnecessary steps across fragile areas.
🌿 Course Care Note: Check your shoes before walking onto a green. Remove large mud clumps and avoid dragging your feet. Small habits protect turf for every group behind you.
Common mistakes when customizing golf shoes
Most problems come from making a change too thick, too permanent, or too close to a support area. A design may look fine indoors and fail after one wet walk or long practice session.

Making the design too heavy
Extra weight can change how the shoe feels during the swing. It can also increase fatigue during a walking round. Keep decorations flat and small.
Covering the flex point
The forefoot bends as you walk. A hard layer across this area may crack or create a pressure point. Place designs beside, not across, the main crease.
Blocking drainage or airflow
A shoe needs to release heat and moisture. Thick tape or sealed decoration can trap sweat. This may increase discomfort and blister risk.
Changing the sole
The sole affects traction and turf contact. Avoid glue, paint, sharp objects, and thick overlays on the outsole. This rule applies to beginners and skilled players alike.
Skipping the test round
Do not take an untested pair into a tournament. Test the shoes on a range, putting green, or short nine-hole round. Pay attention to hot spots, slipping, and changes in balance.
Ignoring pain
Pain is a warning, not a normal part of customization. Stop wearing the shoes if you feel sharp pain, numbness, swelling, or lasting soreness. See a doctor for persistent pain. A PGA professional can help with movement and footwear questions, but a doctor should assess injury.
| Mistake | Sign | Better choice |
|---|---|---|
| Thick design | Cracking or rubbing | Apply thin layers |
| Tight laces | Numb toes | Reduce pressure |
| Sole changes | Slipping or turf marks | Leave traction alone |
| Poor drying | Odor or peeling | Air dry fully |
| No test walk | Blisters on the course | Test before 18 holes |
| Ignored pain | Soreness after play | Stop and seek advice |
A simple design that stays comfortable is more useful than an impressive design that changes your walk.
A practice test for customized golf shoes
A short test can reveal problems before a full round. This suits beginners, parents of junior golfers, and experienced players who have made a permanent design.

Use a flat, safe area with enough room for movement. A driving range is useful for full swings, while a practice green can reveal how the shoes feel during putting and green reading.
| Test stage | What to do | Stop if |
|---|---|---|
| Indoor walk | Walk for 10 minutes | A seam rubs |
| Stance check | Take golf posture | Feet feel uneven |
| Slow swings | Make 10 half swings | Shoes slide |
| Full swings | Hit a few range shots | Pain appears |
| Short game | Chip and pitch | Toes grip the shoe |
| Walking test | Walk several holes | Hot spots form |
The test does not prove the shoes are perfect. It only gives useful information. Repeat it in the weather and socks you expect to use.
Beginner test
Beginners should use half swings first. Check whether the feet stay stable during the backswing and downswing. Then make a few full swings at a relaxed tempo.
Do not judge the shoes by one perfect shot. Focus on comfort, balance, and freedom of movement. A new golfer may need several practice sessions to notice what feels normal.
Improving-player test
An improving player can test shots from different lies. Try a fairway stance, light rough, a bunker stance, and a sloped lie if the practice area allows it. Notice whether the shoes help you maintain posture without forcing your feet.
Do not use a shoe test to change your swing. Keep the same club, stance, ball position, and tempo. This makes it easier to identify whether the shoe or the swing caused a difference.
Junior and parent test
A parent should check the toe space, heel hold, and lace safety. The child should walk, bend, and make slow swings. Ask where the shoe feels tight or loose.
A junior’s feet can change quickly. Recheck comfort during the season. Do not add thick inserts or decorations to make a loose shoe feel secure. Correct fit matters more than a custom design.
Small drills that connect shoes to balance
These drills do not customize the shoes. They help you notice how your feet work with the ground. They suit golfers who want better balance without making major swing changes.

Balanced finish drill
Make a slow swing and hold the finish for three seconds. Keep the lead foot stable and the chest facing the target. If you lose balance, reduce the swing length.
This drill suits beginners and seniors who want control. It may not suit a golfer with pain or a recent injury without medical guidance.
Feet-together drill
Place your feet close together and make short pitch shots. A pitch is a small shot that sends the ball higher than a chip. Use a soft tempo and focus on centered contact.
This drill exposes excess body movement. It is not ideal for full-power drives or players who cannot maintain safe balance.
Step-through drill
Start with a narrow stance. Make a small swing and let the trail foot move toward the target after impact. This can help you feel weight shift without forcing a hard move.
Use a low number of repetitions. Stop if the knees, hips, back, or feet feel strained. Warm up first.
| Skill level | Drill | Main goal |
|---|---|---|
| Beginner | Balanced finish | Stable finish |
| Beginner | Short chip | Quiet feet |
| Improving | Feet-together pitch | Centered contact |
| Improving | Step-through swing | Smooth pressure shift |
| Junior | Half-swing hold | Body control |
| Senior | Short-shot balance | Safe movement |
Drills should feel controlled. They should not create pain or force a golfer into a position that does not fit their body.
💡 Pro Tip: If your customized shoes feel different, begin with putting and chipping. These short shots use less force and can reveal pressure points before you make a full driver swing.
When to ask for professional help
Some changes are simple enough for home work. Others need expert input. Ask for help when customization affects fit, support, traction, or pain.

A PGA professional can observe your stance, posture, balance, and foot movement during the swing. A shoe repair specialist can assess material, stitching, sole separation, and safe alterations. A doctor or physical therapist should assess ongoing pain, numbness, swelling, or injury.
Seek help when:
- The heel slips even with correct lacing.
- The toes feel numb.
- The shoe causes blisters after a short walk.
- The sole separates.
- Your balance changes after customization.
- Your knee, hip, back, or foot hurts.
- You need a custom insole for a medical reason.
- You plan to change the sole or traction.
- You need to confirm tournament conformity.
The same advice applies to men, women, juniors, and seniors. Body size does not determine whether a change is safe. Foot shape, mobility, injury history, and course demands matter more.
⚠️ Safety Warning: Stop using customized shoes if they cause sharp pain, numbness, or a loss of balance. For lightning, leave the course at the first warning and follow the facility’s safety plan. Warm up, drink water, use sun protection, and keep clear of other golfers’ swing areas.
Frequently asked questions
Q: Can I paint my golf shoes?
A: You can add a small, flexible design to a suitable upper surface after testing it first. Keep paint away from the sole, cleats, flex points, drainage areas, and inner lining. Let it dry and cure fully before walking or swinging.
Q: How long does it take to customize golf shoes?
A: A lace or name change may take a few minutes. A painted design may take several sessions because thin layers need time to dry. Testing adds more time, but it can prevent discomfort during a full round.
Q: Is it safe to change golf shoe soles?
A: Sole changes are higher risk. They may affect traction, balance, turf, walking comfort, and rules status. Use a qualified shoe repair professional and check the latest Rules of Golf and local course policy.
Q: Can customization improve my golf swing?
A: Customization can help comfort and awareness, but it does not correct swing faults. A slice, hook, poor impact position, or weak follow-through usually needs technical practice and clear feedback. A PGA professional can help with a recurring fault.
Q: How should seniors customize golf shoes?
A: Seniors should protect toe room, heel security, easy lacing, and stable support. Avoid thick decorations, hard seams, and changes that alter the insole. If foot pain exists, seek medical advice before changing the shoe.
Q: What is the best customization for junior golfers?
A: Simple name marks, left-right symbols, and safe color details are good starting points. Keep the shoe light and flexible. Check fit often because a junior’s feet and movement can change during the season.
Q: Can women and men use the same customization methods?
A: Yes. The method depends more on shoe material, foot shape, support needs, and playing conditions than on gender. Women and men should both protect toe space, heel hold, traction, and comfort.
Q: Can I customize shoes for a wet climate?
A: Use small, flexible changes that do not block drainage or trap moisture. Test the design in damp conditions if possible. Remember that customization does not create waterproofing.
Q: Do left-handed golfers need different shoe customization?
A: No special shoe design is required for left-handed golfers. Both left- and right-handed players need stable feet and comfortable movement. Personal marks can help identify the lead and trail foot if that helps instruction.
Q: Can custom golf shoes damage a green?
A: Decorations on the upper usually do not damage a green. Changes to the sole, sharp objects, loose parts, or poor traction can create problems. Keep the outsole unchanged and follow course rules.
Q: Should I use customized golf shoes in a tournament?
A: Test them well before competition. Then check the latest Rules of Golf, the event conditions, dress rules, and local committee guidance. When a design could act as an alignment aid or change traction, ask the committee first.
Q: How do I clean customized golf shoes?
A: Brush away dry dirt, wipe the upper with a suitable damp cloth, and let the shoes air dry. Avoid strong heat. Check the custom areas for peeling, cracking, or rough edges after every few rounds.
Q: What if customization causes a blister?
A: Stop using the shoes until you identify the cause. Check seams, laces, material edges, and fit. A blister that keeps returning may need a fit assessment, and persistent pain should be checked by a doctor.
Final thoughts
The best way to customize golf shoes is to protect the parts that make them work. Start with laces, small marks, flat color details, or removable designs. Keep the sole, cleats, heel support, toe room, and drainage areas unchanged.
Test the shoes indoors, on the range, and during a short practice round. Check them in the weather and on the course type where you normally play. A good customization should feel like part of the shoe, not a distraction from your grip, stance, posture, tempo, impact, or follow-through.
Golf is a long walk with many small choices. A personal shoe design can make that walk feel more like your own. Keep it safe, comfortable, course-friendly, and within the latest rules.