How To Embroider A Golf Bag: Step-By-Step Guide
Embroidery on a golf bag is done by cleaning, stabilizing, transferring a design, and stitching it in place.
I have spent years embroidering gear for players and shops, and I’ll walk you through exactly how to embroider a golf bag with clear steps, tool lists, and pro tips. This guide covers both hand and machine methods, design planning, common pitfalls, and care instructions so you can add a durable, pro-level embroidered logo or monogram to your bag.

Materials and tools you need
Choose the right gear before you start. Below is a focused list that works for most golf bags and projects.
- Embroidery thread. Use polyester for outdoor durability or rayon for shine.
- Needles. Use sharp or embroidery needles sized for your thread and fabric.
- Stabilizer. Tear-away or cut-away stabilizer supports stitches on thick bag fabric.
- Scissors. Small sharp scissors for trimming threads and stabilizer.
- Transfer tools. Water-soluble pens, carbon paper, or heat-transfer pens help move designs.
- Hoop or clamp. For machine work, use a hoop or magnetic clamp to keep fabric flat.
- Sewing machine with embroidery unit, or hand tools. A dedicated embroidery machine helps with logos.
- Masking tape and clips. To secure linings and seams while working.
- Optional: Iron, pressing cloth, and seam ripper.
how to embroider a golf bag starts with picking the right thread and stabilizer. Polyester thread resists sun and moisture. Cut-away stabilizer often gives the best long-term support for heavy fabrics.
Preparing your golf bag for embroidery
Good prep makes a neat stitch and saves time. Follow these steps.
- Choose placement. Pick a flat panel or pocket with enough space for your design.
- Clean the area. Wipe away dirt and oils so adhesive stabilizers and thread adhere well.
- Remove or loosen straps. Take out anything that can block hooping or stitching.
- Check lining. If the bag has a thin lining, add extra stabilizer or a backing patch.
- Test a patch. Try stitching a scrap of the same fabric to confirm tension and look.
how to embroider a golf bag safely includes removing items inside pockets and creating a clean, flat workspace. This prevents puckering and uneven stitches.

Design planning and transfer
A good plan ensures the finished embroidery looks intentional and polished.
- Size and scale. Measure the space and scale your design to fit proportionally.
- Fonts and logos. Use simple fonts for small sizes; complex logos may need simplification.
- Digitizing for machines. Convert artwork to a stitch file with proper underlay and density.
- Transfer methods. Use water-soluble stabilizer, transfer paper, or a temporary adhesive to move the design.
- Color choice. Contrast the thread color with the bag for visibility and style.
how to embroider a golf bag well means digitizing logos with the right stitch types. Use a satin stitch for letters and a fill stitch for large color blocks. If you are unsure, test a small sample.

Quick answers to common search questions
Q: Can I embroider on leather or vinyl panels?
A: Yes, but use a leather needle, use minimal perforation, and choose a stabilizer that won’t stretch the material.
Q: Is it better to hand stitch or machine stitch?
A: Machine is faster and more consistent for logos; hand is great for small repairs and personal touches.
Q: How large should a monogram be on a bag?
A: Aim for 2.5 to 4 inches high for readable letters on common bag panels.

Hand embroidery: step-by-step guide
Handwork gives control in tight spots. Follow this clear process.
- Prepare the panel. Clean and stabilize the area with cut-away or tear-away under the fabric.
- Transfer the design. Trace the pattern with a water-soluble pen or transfer paper.
- Thread your needle. Use stranded or embroidery thread doubled if you want bolder stitches.
- Start with an outline. Use a backstitch or stem stitch to define the design.
- Fill shapes. Use satin stitch or long-and-short stitch for fills. Keep stitches even.
- Secure and trim. Knot securely on the back and trim excess stabilizer and threads.
From my experience, small lettering pucker easily. Use plenty of stabilizer and keep stitches short. I once tried a dense fill without extra backing and had to redo the panel—so don’t skip that step.

Machine embroidery: step-by-step guide
A machine gives speed and professional results. Take time to set up.
- Hoop with stabilizer. Use a hoop or magnetic clamp with cut-away stabilizer behind the area.
- Position design. Load and align the digitized file so it fits the hoop and panel.
- Lower the needle slowly. Check placement and run a test tack-down stitch.
- Run a test stitch. Use scrap fabric and the same stabilizer to confirm tension and thread choice.
- Stitch the final design. Monitor speed and thread breaks. Pause if the fabric shifts.
- Finish and clean. Trim jump threads, remove stabilizer as recommended, and press lightly.
how to embroider a golf bag by machine demands careful hooping. If the panel is curved or padded, consider removing it or using an embroidery clamp that conforms to the curve.
Care and maintenance for embroidered golf bags
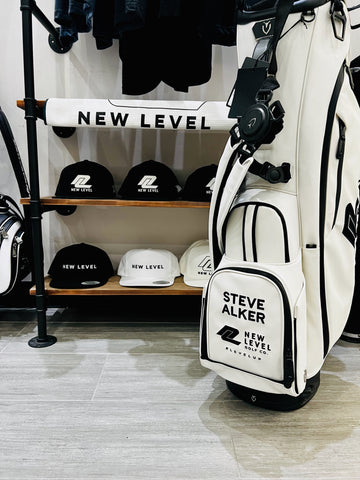
Proper care keeps embroidery crisp and long-lasting.
- Spot clean gently. Use mild soap and a soft brush to clean the embroidered area.
- Hand wash if needed. Use cool water and mild detergent; avoid heavy agitation.
- Air dry only. Do not tumble dry embroidered areas to prevent shrinkage and distortion.
- Repair early. Fix loose threads quickly by trimming and re-stitching small spots.
how to embroider a golf bag includes telling owners to avoid abrasive cleaners and to reapply water-repellent sprays if the bag is exposed to rain or sun frequently.
Troubleshooting and pro tips
Here are common issues and quick fixes to keep your work smooth.
- Puckering. Add heavier cut-away stabilizer or reduce stitch density.
- Thread breaks. Use fresh, good-quality thread and correct needle size.
- Misalignment. Re-hoop or re-clamp and use registration marks for accuracy.
- Fading. Choose UV-resistant polyester thread for outdoor gear.
- Bulky seams. Work around big seams or add a small patch of stabilizer underneath.
A tip from my shop: mark the center of the design with a small stitch and align it to a visible bag landmark. This prevents misplacement and wasted work.
Personal experience and lessons learned
I’ve embroidered dozens of golf bags for teams and custom orders. A few lessons stuck.
- Always test on scrap fabric first. This avoids surprises and saves time.
- Use the right stabilizer. I once used a tear-away on a dense fill and the stitches pulled loose. Cut-away worked better.
- Keep designs simple for small spaces. Thin fonts vanish when shrunk to fit.
- Communicate with customers. Ask about color preferences and wear expectations ahead of time.
how to embroider a golf bag well comes down to patience and testing. My early mistakes taught me to slow down and check every step.
Frequently Asked Questions of how to embroider a golf bag
Can I embroider directly onto a vinyl golf bag panel?
Yes. Use a leather or heavy-duty needle, minimal perforation, and a cut-away stabilizer to support stitches.
How long does machine embroidery take for a small logo?
A small logo often takes 5 to 15 minutes to stitch, plus time for hooping, setup, and cleanup.
Will embroidery on a golf bag survive rain and sun?
Yes, if you use polyester thread and UV-resistant treatments, the embroidery can withstand outdoor exposure.
Can I remove the lining to embroider inside a bag pocket?
Often yes. Removing or loosening a lining makes hooping easier. Reattach carefully to keep the bag tidy.
How do I prevent puckering on thick fabric?
Use ample cut-away stabilizer, lower stitch density, and test on scrap fabric to adjust tension.
Is it expensive to have a golf bag embroidered professionally?
Costs vary by size and complexity, but expect to pay more for large, multi-color designs and digitizing fees.
Can I add a name with hand embroidery?
Yes. Hand embroidery works well for single names or small monograms and gives a personal touch.
Conclusion
You now have a full roadmap for how to embroider a golf bag, from prep and design to stitching and care. Start with the right materials, test on scrap, and choose hand or machine methods based on your goals. Take a small step today: pick a simple design and try a test stitch on scrap fabric to build confidence. If you enjoyed this guide, share your finished bag, subscribe for more tutorials, or leave a comment with questions or your own tips.