How To Change Golf Shoe Spikes: Easy Step-By-Step Guide
Changing golf shoe spikes is a simple maintenance task once you know which spike system your shoes use. Most golfers can remove worn cleats, clean the sockets, fit new cleats, and check the grip in about 10 to 20 minutes. The key is to use the correct replacement pattern, a clean tool, and gentle force.
Fresh spikes can help your feet stay planted during the backswing, downswing, and follow-through. They can also improve comfort while walking from the tee box to the fairway, rough, bunker, and green. This guide explains how to change golf shoe spikes safely, how to spot worn spikes, and how the process differs for beginners, juniors, seniors, and frequent walkers.
Quick answer: How do you change golf shoe spikes?
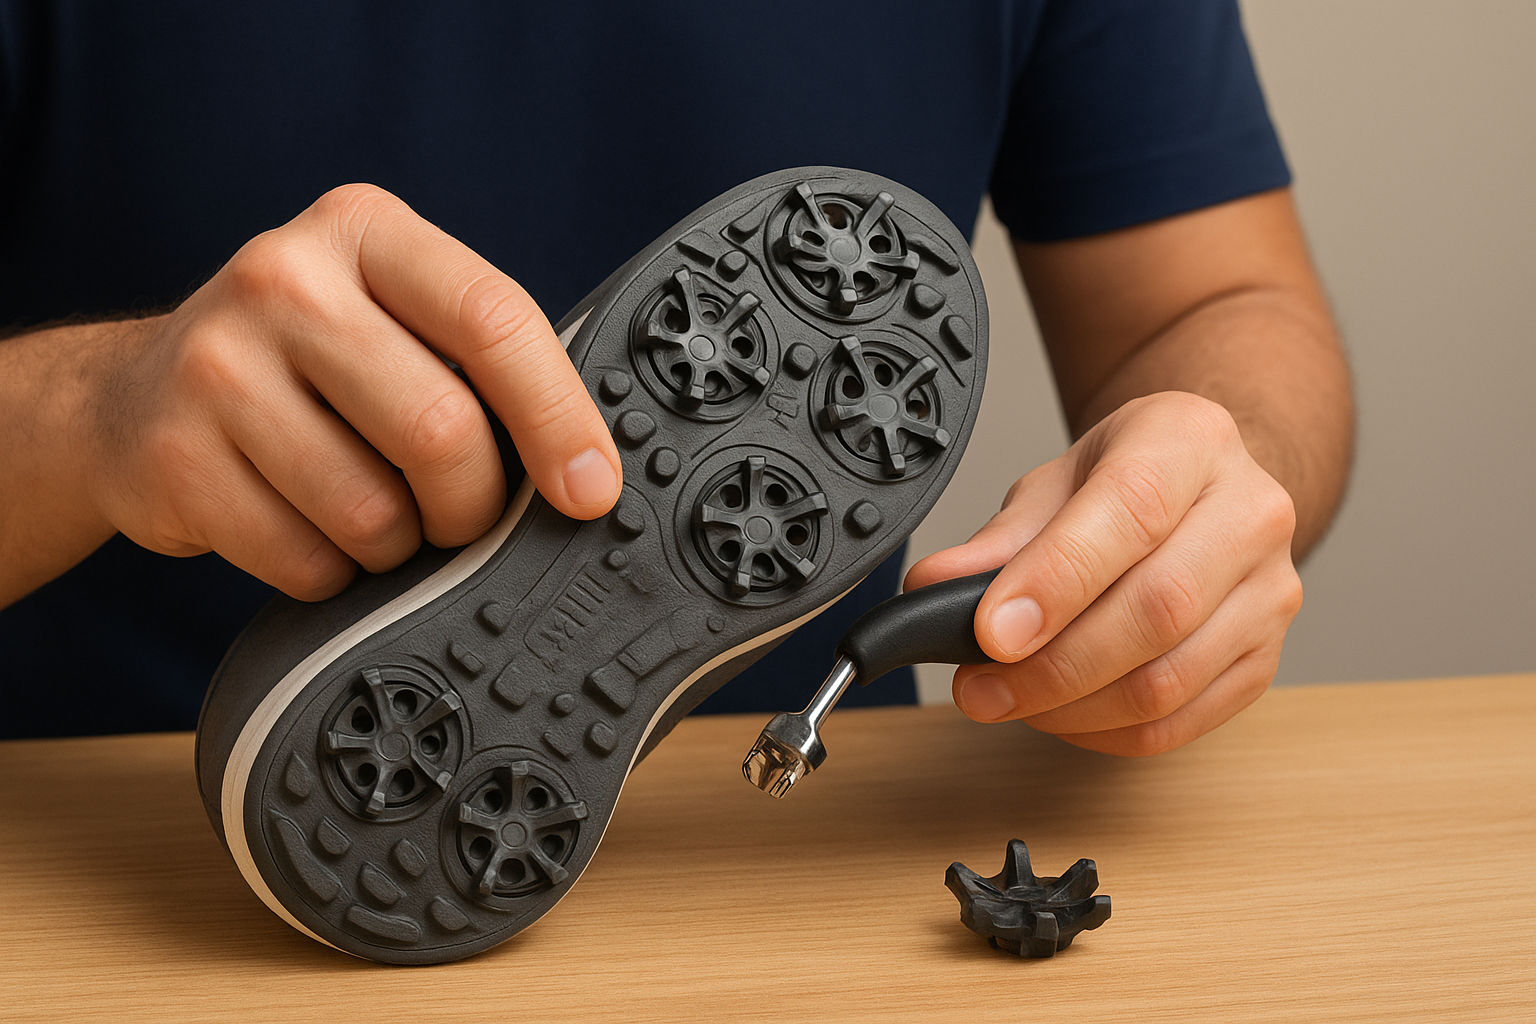
To change golf shoe spikes, first clean the shoe and identify the spike fitting. Remove the old spikes with the correct golf spike wrench by turning counterclockwise. Clean the sockets, align the new spikes, and turn them clockwise until snug. Do not force a mismatched spike or overtighten it. Walk on a safe surface and check that every spike sits flat before playing.
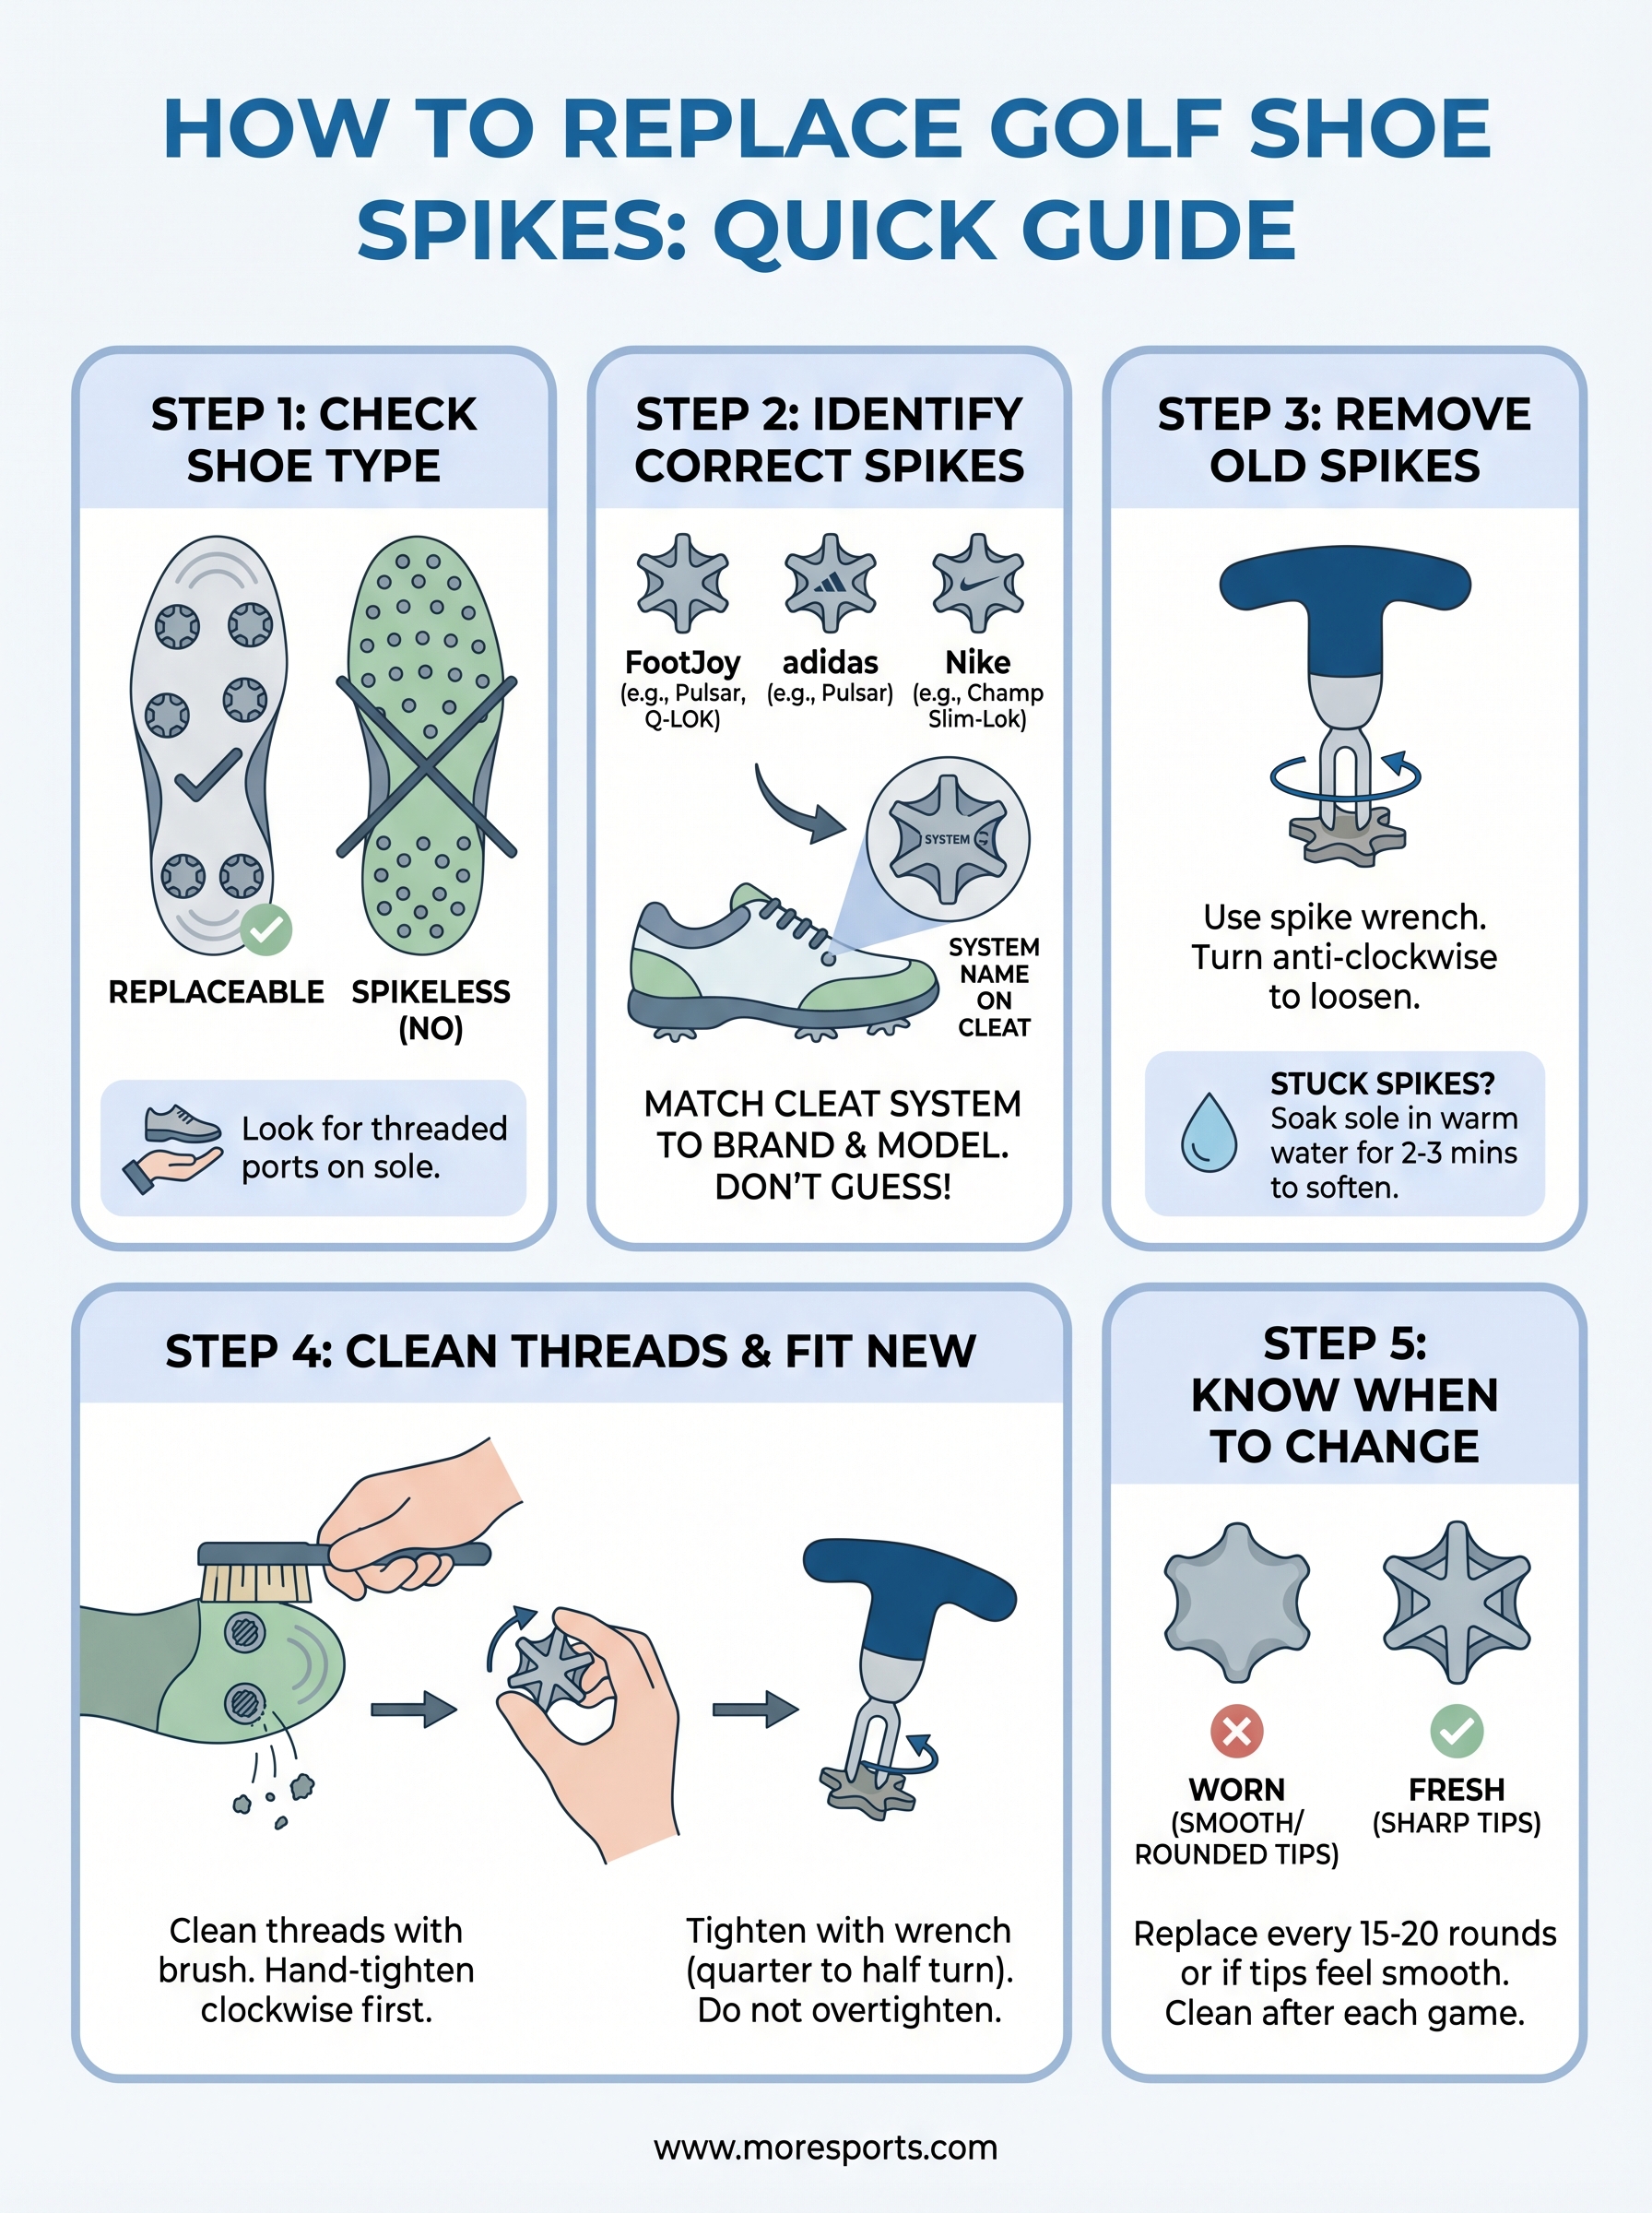
Most modern golf shoes use soft plastic or rubber cleats that twist into a threaded socket. Some older shoes use metal spikes or a different fitting system. The shoe brand, model, and spike pattern must match, even when two cleats look similar.
Why changing golf shoe spikes matters
Worn spikes can reduce traction when your feet push into the ground during the swing. Good traction supports a stable stance, balanced posture, and controlled tempo. It does not fix a slice, hook, poor grip, or faulty swing path, but it can remove one source of unwanted movement.
A spike has a hard job. It grips wet grass, soft turf, firm fairways, and sloped lies while your body turns at speed. A driver swing may create strong ground pressure, while a bunker shot, chip, or pitch may demand a stable base with less rotation.
A golfer who walks 18 holes may notice worn spikes sooner than a golfer who rides. Seniors, players with balance concerns, and golfers who play hilly courses may also value reliable traction. Juniors need special care because shoe size and foot growth can change fit and support before the spikes look worn.
Worn spikes can affect more than grip
A worn cleat may allow the foot to slide during impact. That slide can change the low point of the swing, face control, or balance through the finish. A player may then blame the backswing or downswing when the real issue is unstable contact with the ground.

Spikes also affect walking comfort. If a cleat is damaged, loose, or missing, pressure may shift to one side of the foot. That can cause a sore heel, arch, ankle, knee, or lower back after a long round.
Replacing spikes cannot treat an injury. Stop playing if you feel sharp or growing pain, and seek medical advice when pain persists. A PGA professional can help with swing faults, but a health professional should assess pain.
💡 Pro Tip: Check the spikes before you check your swing. A stable base gives you clearer feedback during practice, especially when you are working on tempo, posture, or impact.
How often should golf shoe spikes be changed?
There is no single schedule for every golfer. Course moisture, walking distance, stride, body weight, swing speed, storage, and the hardness of the turf all affect wear. Inspect the spikes before each round and replace them when the grip pattern is rounded, flattened, cracked, torn, or missing.
| Playing pattern | Usual inspection need | Signs to act |
|---|---|---|
| Occasional rider | Before each round | Cracks, loose cleats, or a missing spike |
| Regular walker | Weekly or before each round | Rounded tread or reduced grip |
| Junior or growing player | Before each season and round | Poor fit, damaged sole, or uneven wear |
The table gives a starting point, not a rule. A golfer who plays wet links golf may wear spikes in a different way from a golfer who plays a dry executive course.
Know your golf shoe spike system
The most important step is identifying the fitting before you remove anything. Golf spikes are not universal. Thread size, locking shape, key pattern, and base design can differ across shoes.
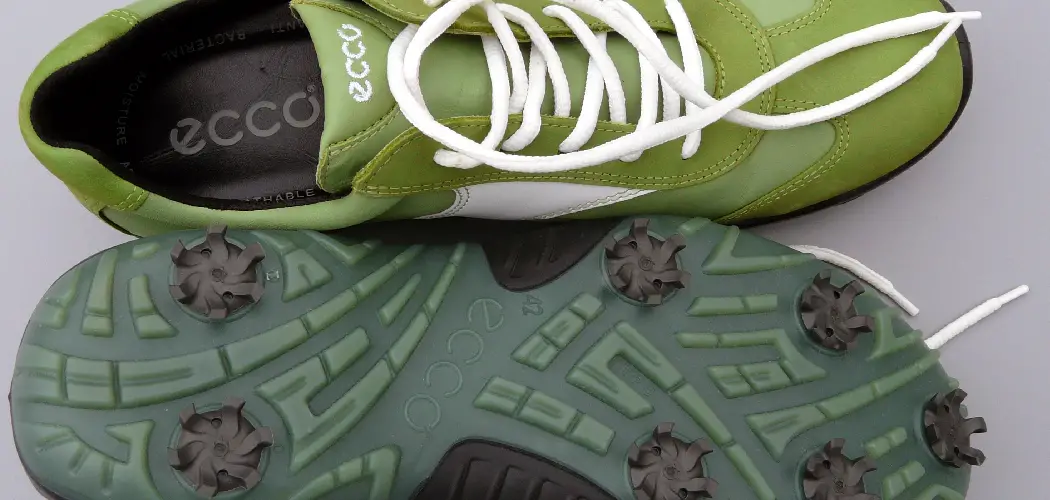
Look at the cleat under the shoe. Many replaceable soft spikes have a round base with two, three, or more small locking points. The socket may have a visible brand mark, a star-like pattern, or a shaped opening for a specific wrench.
Do not rely on color alone. Two black cleats may use different threads or locking systems. A cleat that starts to turn but does not seat flat may be the wrong type or may have dirt blocking the socket.
Soft spikes, hybrid cleats, and metal spikes
Soft spikes are made from flexible plastic or rubber. They are common because they provide traction with less damage to greens and clubhouse floors. Hybrid cleats combine a firm base with softer traction arms.

Metal spikes are less common at many facilities. Some clubs ban them because they can mark greens, damage floors, or affect turf. A course may also set a local rule about shoe design or metal spikes. Check the latest Rules of Golf, club policy, and local committee instructions before play.
| Spike type | Main feature | Best match |
|---|---|---|
| Soft plastic or rubber | Flexible traction arms | Most modern golf shoes |
| Hybrid cleat | Firm base with flexible grip points | Golfers seeking a balance of support and turf care |
| Metal spike | Hard, sharp traction points | Only where the club and local rules permit |
The type of spike does not decide your handicap or playing format. It may affect comfort, grip, turf care, and club policy. Stroke play, match play, scramble, and Stableford rounds still follow the applicable Rules of Golf and local rules.
Why the spike pattern must match
A replacement spike must fit both the socket and the shoe sole. The lock pattern controls how the cleat turns and stops. The thread or base controls how it sits against the shoe.
If the pattern is wrong, the spike may cross-thread, wobble, or leave a gap. That gap can collect mud and water. It may also let the cleat twist during a swing.
Take one old cleat with you when checking the fitting. Compare the base shape, locking points, and center hole. Never force a cleat because it looks close enough.
Tools and setup before you begin
A clean work area makes the job easier. You need the correct spike wrench, a stiff brush or old toothbrush, a cloth, and a small amount of water for cleaning. A wooden toothpick can help remove packed grass, but avoid sharp metal tools that can damage the socket.

Place the shoes on a firm surface with the soles facing up. A garage, porch, or workbench is useful. Avoid changing spikes on a soft lawn because the cleat can pick up soil and the shoe may become wet.
Remove loose dirt from the entire sole first. Mud around the spike base can hide cracks and make the wrench slip. Let wet shoes dry enough to handle, but do not use high heat, such as a radiator or hair dryer, because heat can damage adhesives and materials.
| Item | Purpose | Safe use |
|---|---|---|
| Correct spike wrench | Turns the old and new cleat | Keep it fully seated before turning |
| Stiff brush | Removes grass and dirt | Brush around, not across, delicate materials |
| Cloth and water | Wipes the sole and socket | Use only enough water to lift dirt |
| Small wooden pick | Clears packed debris | Work gently without widening the socket |
The wrench should fit the cleat without rocking. If it slips, stop and clean the fitting. A slipping wrench can round the locking points and make removal harder.
⚠️ Safety Warning: Keep fingers clear of the wrench path. Do not brace the shoe against your hand while using heavy force. If a spike is seized, protect your hands and ask a golf repair professional for help.
How to change golf shoe spikes step by step
The best method is slow and even. Work on one shoe at a time, and keep the old cleats until you confirm that the new ones fit correctly.
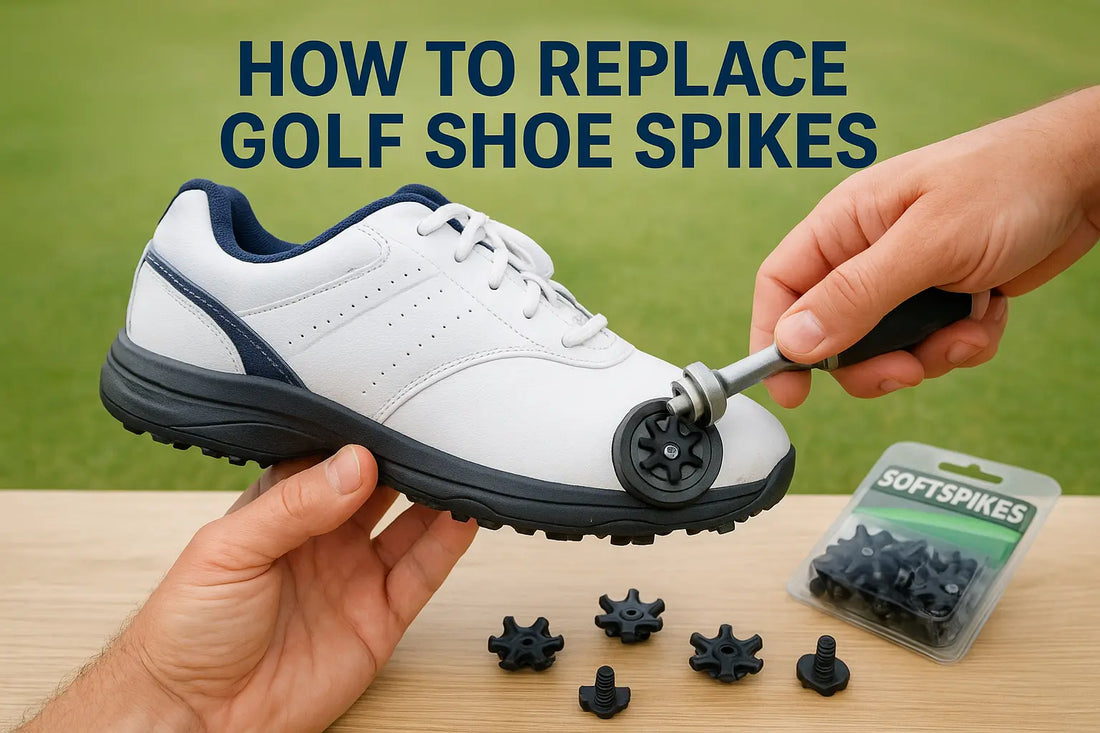
1. Inspect the shoes and mark damaged spikes
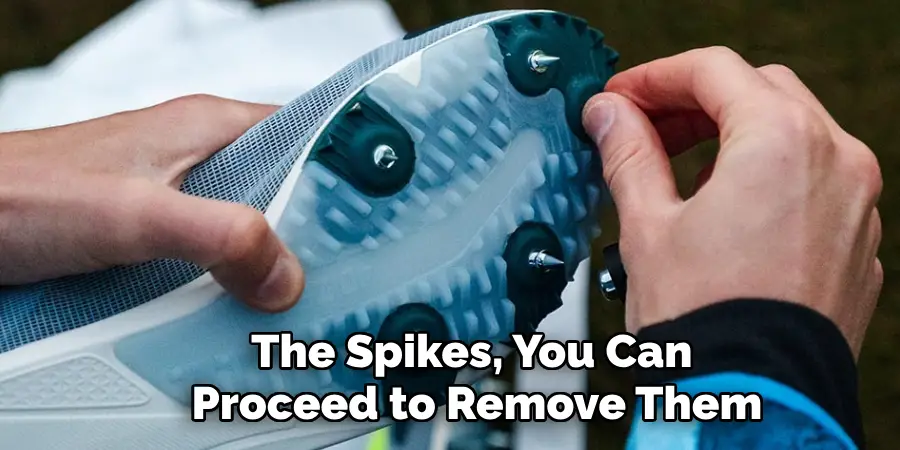
Turn both shoes over and examine every cleat. Look for missing traction arms, cracks, flat edges, loose bases, and uneven wear. Also inspect the sole for separation, cuts, or deep damage.

A single damaged cleat can affect balance. Mark it with a small piece of removable tape if you want to track the problem. Compare the left and right shoes, since one side may wear more due to your swing pattern or walking style.
Right-handed golfers often create different pressure patterns from left-handed golfers. That does not mean one foot must always wear first. Swing mechanics, slopes, stride, and cart use all matter.
2. Remove loose grass and mud
Brush the sole and the area around each spike. Use a damp cloth for stuck dirt. For packed grass, use a wooden pick with light pressure.

Clean the socket before inserting the wrench. Dirt can stop the wrench from reaching the locking points. It can also make a new cleat sit at an angle.
Do not soak the shoe. Excess water can reach the insole, lining, or sole bond. This matters for golfers who play in wet climates or store shoes in a closed golf bag.
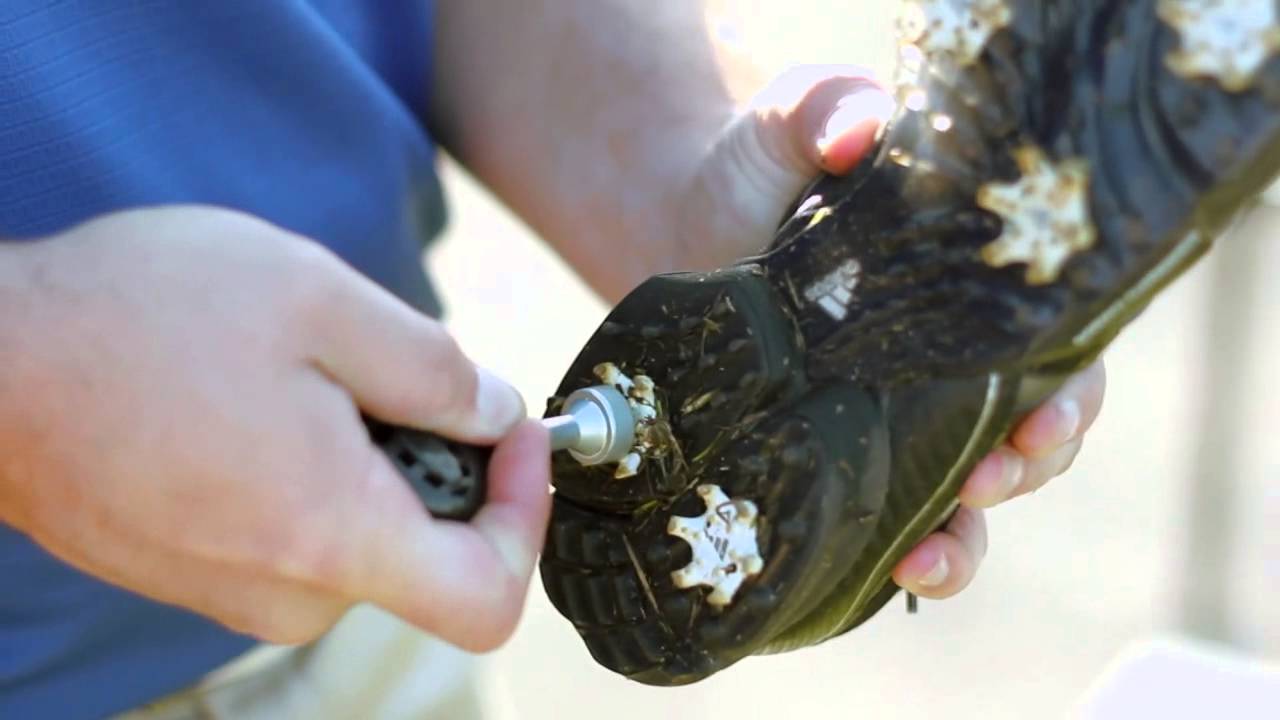
3. Seat the wrench fully
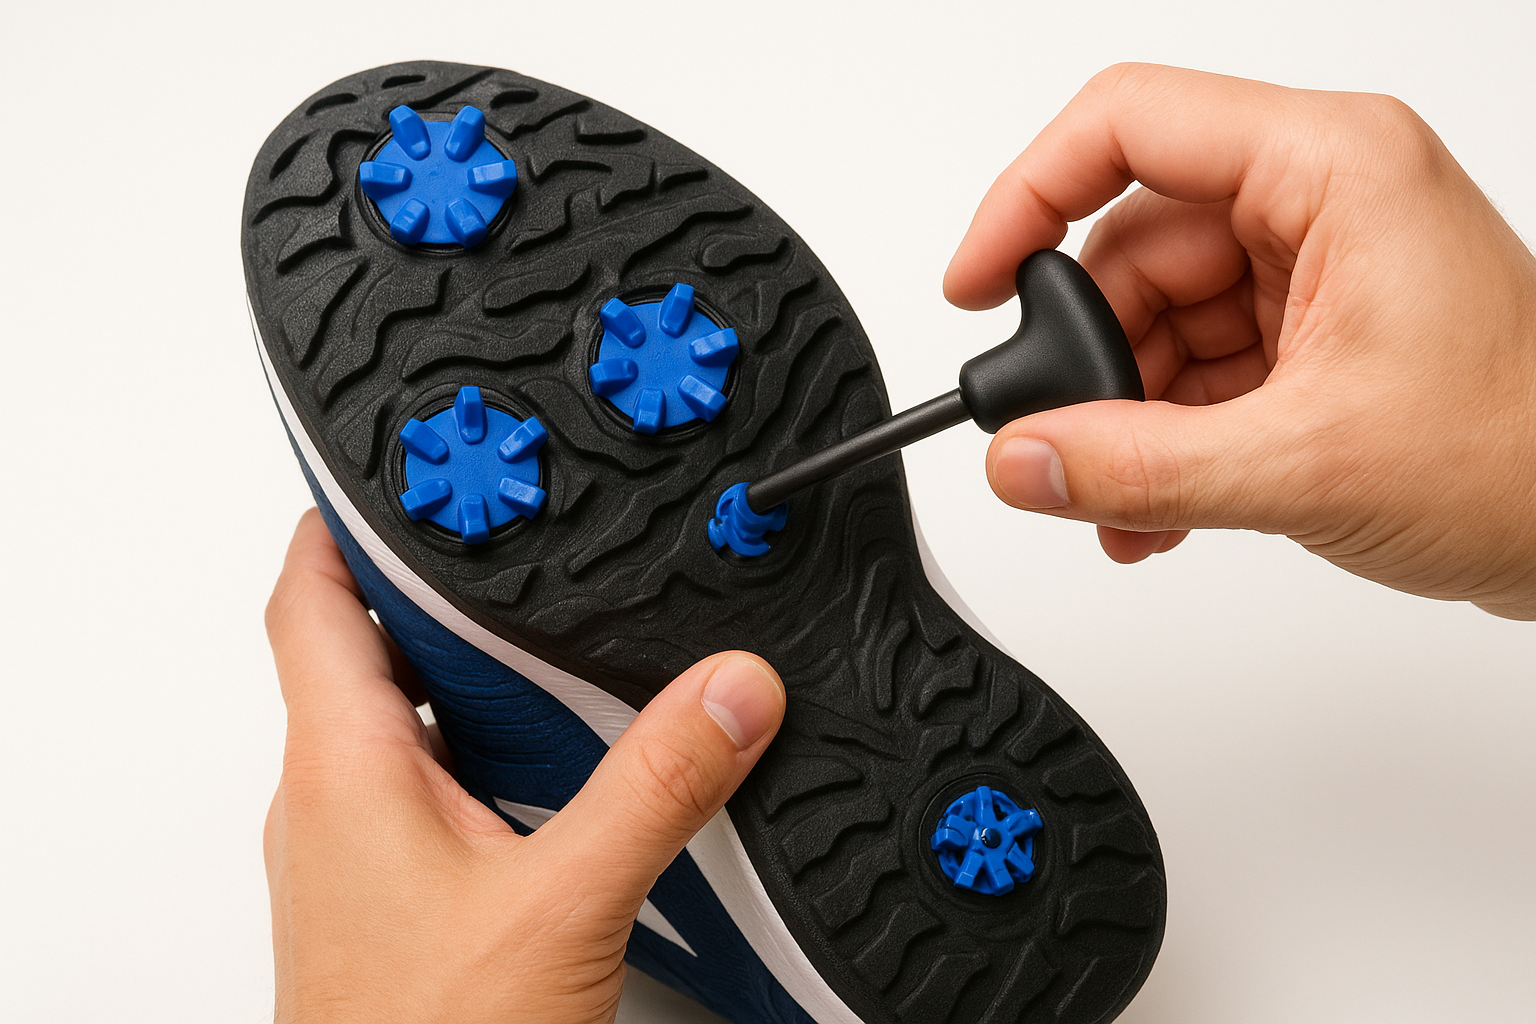
Place the wrench into the spike fitting. Push it down until the wrench sits firmly in the key pattern. Keep the wrench straight.

A proper fit feels stable. If the wrench rocks, remove it and inspect the cleat. The wrong wrench may damage the fitting and make the spike difficult to remove.
For a child or junior golfer, an adult should handle this step. Small hands may not have the strength or control needed to keep the tool straight.
4. Turn the old spike counterclockwise
Most replaceable golf spikes loosen counterclockwise and tighten clockwise. Turn the wrench slowly to the left while keeping downward pressure.

If the cleat moves, continue with steady turns. If it does not move, do not jump to extreme force. Clean the fitting again and try gentle back-and-forth movement.
Some spike systems use a different release action. Check the shoe or spike fitting instructions if the cleat does not respond in the normal direction. Never assume that extra force can solve a fitting problem.
5. Deal with a stuck spike carefully
A stuck cleat may result from dirt, dried mud, corrosion, a damaged base, or cross-threading. Brush the area, apply a small amount of clean water, and allow the dirt to soften. Then dry the area and try the correct wrench again.

Do not cut into the shoe sole or use pliers on the visible traction arms. That can damage the socket or sole. If the wrench keeps slipping, stop before the key pattern becomes rounded.
A golf repair shop or qualified club technician can remove a stubborn cleat with the right tools. This is often safer than turning a small maintenance job into a damaged shoe.
6. Clean the empty socket
Once the old spike is out, inspect the empty socket. Remove grass, sand, and grit from the threads or locking channels.
A clean socket helps the new spike sit flat. Check that the socket is not cracked or pulled away from the sole. If the socket itself moves, the shoe may need professional repair rather than a new cleat.
Do not add random glue, oil, or household lubricant. These substances can collect dirt or affect the shoe materials. Use only care products approved for that shoe system, and follow the manufacturer’s instructions.
7. Align the replacement spike
Hold the new cleat under the shoe and match its base to the socket. Start it by hand if the design allows. Keep it straight rather than pushing it in at an angle.
A correct cleat usually drops into position with little effort. The locking points should line up without twisting or forcing. If the cleat will not start, remove it and check the pattern.
For beginners, compare the new cleat with the old one before installation. For advanced players, inspect all cleats together so you can notice a wrong pattern or different base height.
8. Turn the new spike clockwise
Insert the wrench and turn clockwise. Stop when the spike is snug and the base sits evenly against the sole.
Snug means secure, not crushed. Overtightening can damage the socket, strip the fitting, or make the next replacement difficult. The cleat should not wobble when you touch it.
Install the spikes in a pattern that lets you compare both shoes. Some golfers replace all cleats at once. Others replace only damaged cleats when the remaining cleats still have even, useful tread.
9. Check every cleat by hand
Press and twist each new cleat lightly. It should feel secure and sit at the same height as the others. Look for gaps between the base and sole.
A spike that rocks may be cross-threaded, dirty, mismatched, or damaged. Remove it and inspect the socket instead of playing with it. Uneven cleats can change your stance and increase the risk of slipping.
10. Test the shoes on a safe surface
Put the shoes on and walk on a clean, hard surface for a minute. Then stand in your golf posture and make a few slow practice movements.
Avoid swinging a driver indoors or near people. Test balance with a short backswing, a gentle follow-through, and a small squat. The shoes should feel secure without creating pressure points.
Before a full round, test them at a driving range or practice area. You can then hit a few chip shots, pitch shots, and half swings before using them for a competitive round.
Common problems and simple fixes
Most spike changes fail because of a mismatch, dirt, or excessive force. The table below helps you identify the likely cause before you damage the shoe.
| Problem | Likely cause | Practical fix |
|---|---|---|
| Spike will not turn | Dirt or wrong wrench | Clean the socket and confirm the wrench pattern |
| New spike sits crooked | Cross-threading or poor alignment | Remove it and start again by hand |
| Spike keeps loosening | Under-tightening or damaged socket | Inspect the base and fit |
| Wrench slips | Worn fitting or poor seating | Use the correct wrench and stop if it keeps slipping |
| One foot feels unstable | Uneven or missing cleat | Compare all cleats and replace damaged ones |
A problem that returns after careful fitting may point to a damaged shoe socket. Do not keep tightening. The socket may need repair or the shoe may no longer provide safe support.
What if the old cleat is broken?
A broken cleat may leave only part of the base in the socket. Remove loose pieces with care and inspect the remaining base. Do not dig deeply into the sole.
If the center is damaged, the correct wrench may not grip. A repair professional can use specialized removal tools. This is especially important when the shoe has a bonded sole or waterproof layer.
What if one spike is missing during a round?
If you notice a missing cleat, stop and inspect the shoe when practical. A small missing spike may not create an immediate problem, but a loose base or exposed socket can affect traction.
For a casual round, you may finish only if the shoe remains secure and safe. For a tournament, ask the committee or rules official if the shoe condition creates a concern. Check the latest Rules of Golf and the local committee for current guidance.
A maintenance plan for golf shoes
Good maintenance slows wear and helps you notice problems before a round. Clean the soles after play, especially after wet rounds, bunker shots, or muddy walks through the rough.
Let shoes dry at room temperature. Remove loose soil, but do not strike the sole against a hard object. Store shoes where air can circulate, and keep them away from high heat.
| Timing | Maintenance task | Why it helps |
|---|---|---|
| After each round | Brush off turf and mud | Keeps dirt from packing into sockets |
| Before each round | Check for loose or missing cleats | Finds traction problems early |
| Every few weeks | Inspect sole and upper | Reveals cracks, separation, or wear |
| At season change | Review fit and overall support | Helps with weather and walking demands |
Golfers who play in rain should inspect more often. Wet turf can hide a loose cleat, while dried mud can lock dirt into the socket. Walkers should also check the heel and outer edge of the sole for uneven wear.
🌿 Course Care Note: Clean your shoes away from greens and tee surfaces when possible. Do not leave broken cleats, packaging, or other litter on the course. Repair ball marks, rake bunkers, and keep pace of play in mind.
Spike care for different golfers
The right maintenance habit depends on how you play. A beginner may need a simple visual check, while a high-speed player or daily walker may need a closer inspection.
Beginners and new golfers
Beginners often ask whether changing spikes is difficult. It is usually an easy task, but the first attempt should be slow. Learn the fitting before using force, and practice the wrench motion on a clean, loose cleat.
A new golfer does not need to replace cleats because of a small amount of cosmetic wear. Focus on traction, cracks, loose bases, and comfort. If you cannot identify the spike pattern, ask a golf professional or repair technician to show you.
New players should also remember that shoes are only one part of a stable swing. Grip pressure, stance width, posture, ball position, tempo, and balance matter more to most early swing changes.
Improving amateurs and low-handicap golfers
Improving players may create more ground pressure through the downswing. Fast swing speed, strong rotation, and aggressive weight shift can expose loose or worn cleats sooner.
Check the lead-foot spikes after range sessions and rounds. A stable lead foot can help you train impact and follow-through with clearer feedback. It cannot replace sound technique or a lesson when a swing fault keeps returning.
Players who compete in stroke play, match play, or Stableford should check shoe rules before an event. Local conditions may limit certain spike types, even when the shoes are acceptable for casual play.
Seniors and golfers with balance concerns
Seniors may benefit from a careful traction check because balance and recovery can change with age. A stable shoe can support a confident stance on slopes, damp grass, and uneven lies.
Do not use a spike change to ignore pain or weakness. If you feel pain in the back, knee, hip, ankle, wrist, or elbow, stop and seek medical advice. A golf fitness professional or PGA instructor can then help you adapt warm-up, posture, and swing demands.
Women’s golf and fit considerations
Women golfers use the same basic spike-changing process. The key concerns are fit, foot support, comfort, and the way the shoe interacts with the player’s stride and swing.
A shoe that feels loose can allow movement inside the foot, even when the cleats are new. A shoe that feels too tight may create pressure during a long walking round. Check the full shoe fit, not just the spikes.
Women who play on hilly courses or walk often should inspect the outer heel and forefoot. Uneven wear may show how the foot loads during stance and walking.
Junior golfers and parents
Parents should handle tools and inspect junior shoes before events. Children may not notice a loose cleat, and a growing foot can change shoe comfort quickly.
Use junior-sized golf equipment that fits the child’s body and swing. Do not let a child swing near another person while testing shoe grip. Warm up with easy movements, drink water, use sun protection, and leave the course at the first lightning warning.
A junior golfer may outgrow the shoe before the spikes wear out. Check toe room, heel hold, and pressure points at the start of each season.
Do golf shoe spikes affect the Rules of Golf?
Golf shoes are equipment, so players must follow the current Rules of Golf and any local rules. In most cases, normal golf shoes are allowed, but a committee may set conditions about damaging shoes or spike types.
Rules can change, and local rules can differ by course or event. Check the latest Rules of Golf from the USGA or R&A and ask the tournament committee when unsure.
Metal spikes and local policies
A club may prohibit metal spikes because of turf damage, clubhouse floors, or local maintenance needs. Soft spikes may be expected on greens and around practice facilities.
The restriction may come from club policy rather than a penalty under the general playing rules. Treat the facility’s policy as part of proper golf etiquette. Ask before arriving at a competition.
📜 Check the Rules: Rules of Golf guidance and local conditions can change. Check the latest rulebook and the committee’s notice before a tournament, especially if your shoes use metal or unusual traction parts.
Playing a hole with a loose cleat
A loose cleat is mainly a safety and equipment concern. It can affect your stance, pace, and ability to play safely. If it breaks during a round, inspect it when you can and follow the event’s procedure.
Do not delay play for a long repair while other groups wait. Mark your ball if needed, let faster groups play through when appropriate, and maintain pace. In a formal event, contact a rules official or committee member.
Golf shoe spikes and course conditions
The course changes the demands on your shoes. Wet grass can feel slick, firm turf can increase foot pressure, and a links course may have wind, slopes, and hard ground. An executive course may involve less walking time, but it still has bunkers, rough, and uneven lies.
Spikes do not make every surface safe. Walk with shorter steps on steep wet slopes. Use cart paths where required, follow cart signs, and avoid driving through restricted areas.
| Course condition | Shoe concern | Player adjustment |
|---|---|---|
| Wet fairway | Reduced foot grip | Shorten steps and keep balance centered |
| Firm, dry turf | More pressure under the foot | Check comfort and avoid over-tightening shoes |
| Soft or muddy rough | Dirt packed into cleats | Clean soles before entering sensitive areas |
| Hilly links course | Uneven stance and long walks | Inspect traction and manage pace |
The table applies to beginners and experienced golfers alike. Skill does not remove the need to respect weather and terrain.
Walking versus riding
Walking creates repeated contact with the ground. A walking golfer may notice sole wear, heel wear, and comfort issues earlier than someone who rides between shots.
Riding reduces walking distance but does not remove swing forces. Cart users still need stable shoes for the tee box, fairway, bunker, and green surrounds. Cart safety matters too: follow posted rules, keep hands and feet inside, and slow down on turns and slopes.
Weather, heat, and lightning
Heat can increase fatigue, which may reduce balance and focus. Drink water, use sun protection, and plan a warm-up routine that includes easy walking and gentle movement.
At the first lightning warning, leave the course and follow the facility’s shelter plan. Do not stay outside to finish a hole or repair a cleat. Weather safety always ranks above score, handicap index, birdie chances, or pace of play.
A simple pre-round shoe check
A two-minute check can prevent most spike problems. Make it part of the same routine as checking balls, gloves, tees, and clubs.
- Look at every cleat for cracks, missing pieces, and flat tread.
- Press each cleat lightly to check for movement.
- Inspect the sole for separation or deep damage.
- Check that the upper holds your foot without heel slip.
- Walk a few steps and make slow practice swings.
- Pack a small cleaning tool if the course is wet or muddy.
This check suits all skill levels. New golfers gain confidence, while experienced players avoid a small equipment issue that can distract them during impact.
What changing spikes cannot fix
New spikes can support traction, but they cannot solve every golf problem. They cannot correct a weak grip, poor posture, a steep backswing, an open clubface, or a poor green-reading routine.
If you slice the ball, the clubface is often open relative to the swing path at impact. If you pull the ball, the face may be closed relative to the path. Neither fault proves that your shoes are the cause.
A PGA professional can assess your stance, grip, posture, backswing, downswing, tempo, and follow-through. Take a lesson if a recurring fault remains after basic checks. Do not chase swing changes through pain or force.
Use spike changes as a training checkpoint
After changing spikes, visit a driving range and start with half swings. Notice whether your feet remain stable without gripping the ground excessively. Then move to full swings only if your balance and comfort feel normal.
You can also test chipping, pitching, bunker shots, and putting. Short-game shots use different foot pressure and stance width. A shoe that feels fine in a driver stance should also feel comfortable while walking and reading a green.
When to ask a professional for help
Ask for help when the spike will not come out, the wrench slips, the socket moves, or the sole separates. A trained repair person can protect the shoe and identify damage that is hard to see.
Take a lesson with a PGA professional when foot movement is part of a wider swing issue. A professional can help you understand whether your stance, weight shift, balance, or ground pressure needs work.
See a doctor or qualified health professional for persistent pain. This includes pain in the back, knee, hip, ankle, foot, wrist, elbow, or shoulder. Changing spikes is maintenance, not medical treatment.
Frequently asked questions
Q: How hard is it to change golf shoe spikes?
A: It is usually an easy maintenance task. Most golfers can learn it in one short session. The hard part is identifying the correct spike pattern and avoiding force when a cleat is stuck.
Q: How long does it take to change all golf shoe spikes?
A: A clean pair may take 10 to 20 minutes. Mud, worn fittings, and stuck cleats can make the task longer. Allow extra time before a tournament.
Q: Can I change only one golf shoe spike?
A: Yes, if the other cleats remain secure and have useful tread. Match the replacement pattern and compare the new cleat’s height with the others. Replace more cleats when wear is uneven.
Q: Can I play golf with a missing spike?
A: You may be able to finish a casual round if the shoe remains safe, but inspect it first. Do not ignore a loose base or major traction loss. In competition, ask the committee or rules official.
Q: Do all golf shoe spikes fit all golf shoes?
A: No. Spike systems vary by shoe and model. Check the fitting pattern, base shape, and wrench type. A similar-looking cleat may not lock or sit correctly.
Q: Should I use glue on a loose golf spike?
A: Usually not. Glue can block the socket, collect grit, or damage shoe materials. Clean the fitting and check the correct installation method. Seek repair help if the cleat still loosens.
Q: Why do my golf shoe spikes keep falling out?
A: Possible causes include under-tightening, dirt in the socket, a damaged cleat, cross-threading, or a worn socket. Remove the spike, clean the area, and check the fitting. Repeated failure needs professional inspection.
Q: Can worn spikes cause a golf swing problem?
A: They can contribute to unstable footing, but they are rarely the only cause of a swing fault. Check grip, stance, posture, tempo, and impact as well. A PGA professional can assess the full movement.
Q: Do seniors need different golf shoe spikes?
A: Seniors do not automatically need a special spike type. They should focus on secure traction, comfort, balance, and a proper shoe fit. Anyone with pain or balance trouble should seek appropriate professional advice.
Q: Are golf spikes allowed in match play and stroke play?
A: Normal golf shoes are generally used in both formats, but local rules and club policies can limit certain types. Check the latest Rules of Golf and the event committee’s instructions.
Q: Can juniors change golf shoe spikes?
A: A junior can learn the idea, but an adult should handle the wrench and inspect the result. Junior shoes must fit the child’s current foot, not just the cleat pattern.
Q: How can I make golf shoe spikes last longer?
A: Brush off mud after play, let shoes dry naturally, avoid walking on hard surfaces when possible, and inspect the cleats often. Do not use damaged spikes simply to extend their life.
Q: Should I test new spikes before a tournament?
A: Yes. Walk, stand in your golf posture, and make slow practice swings before competition. Test them at the range if possible, then confirm that every cleat sits flat and secure.
Final thoughts
Changing golf shoe spikes is a small job with a useful payoff: it helps you maintain a stable and comfortable base for the swing and the walk between shots. Clean the shoe, match the fitting, turn gently, and inspect every cleat before you play.
The best habit is a quick check before each round and a deeper inspection after wet, muddy, or hilly play. Look after your shoes, respect course conditions, follow local rules, and ask for professional help when a cleat or socket is damaged. Good equipment care supports good golf etiquette, but your grip, stance, posture, tempo, and decision-making still shape the game.